Stable Diffusion

Learn everything about Stable Diffusion here in this catagory.

Stable Diffusion Men Model Cover Photo

Here are 5 Amazing Stable Diffusion Men Models You Should Try

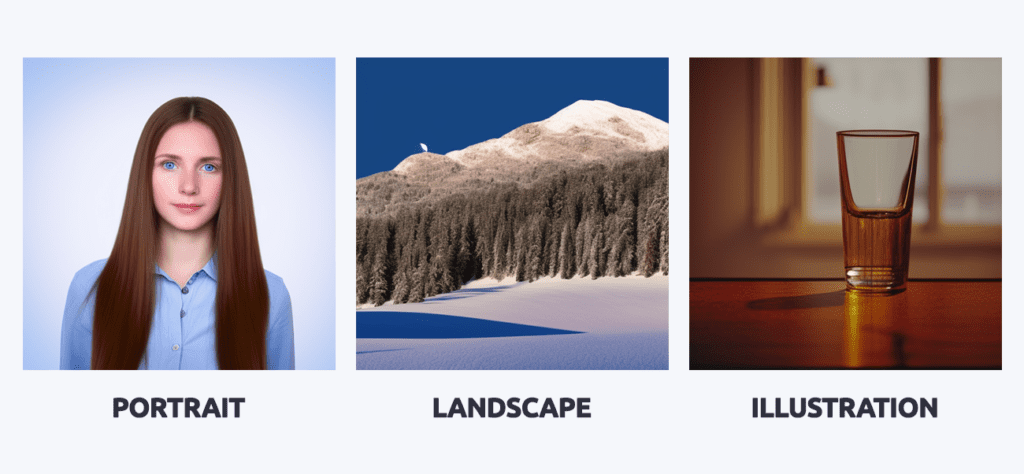
Stable Diffusion is a popular text-to-image AI model that can turn your generative thoughts into actual images. One of the features that sets it apart from its competitors is it comes with 1000+ custom models which you can use to boost your creativity. In this blog, we will be discussing 5 best Stable Diffusion men models which are perfect if you are looking to generate male characters. We will also discuss the workings of each model in detail. So let’s get started.


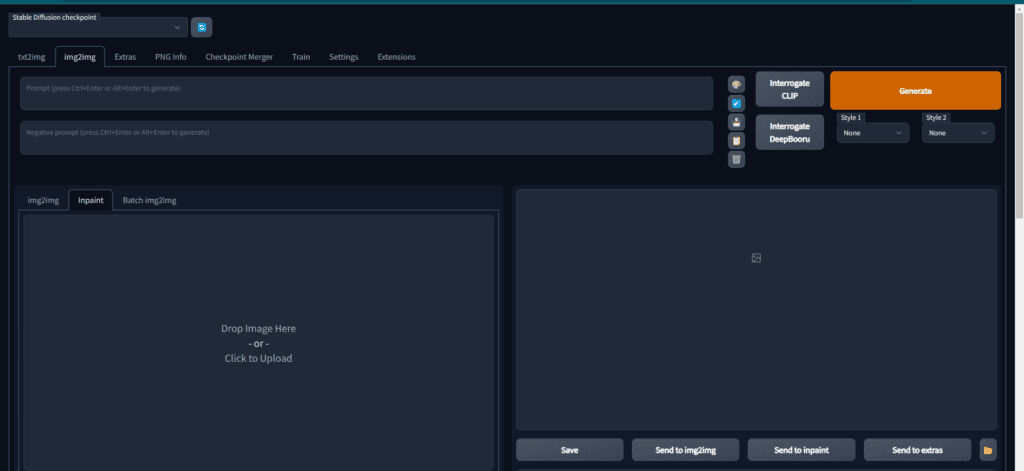
Set Up Stable Diffusion WebUI

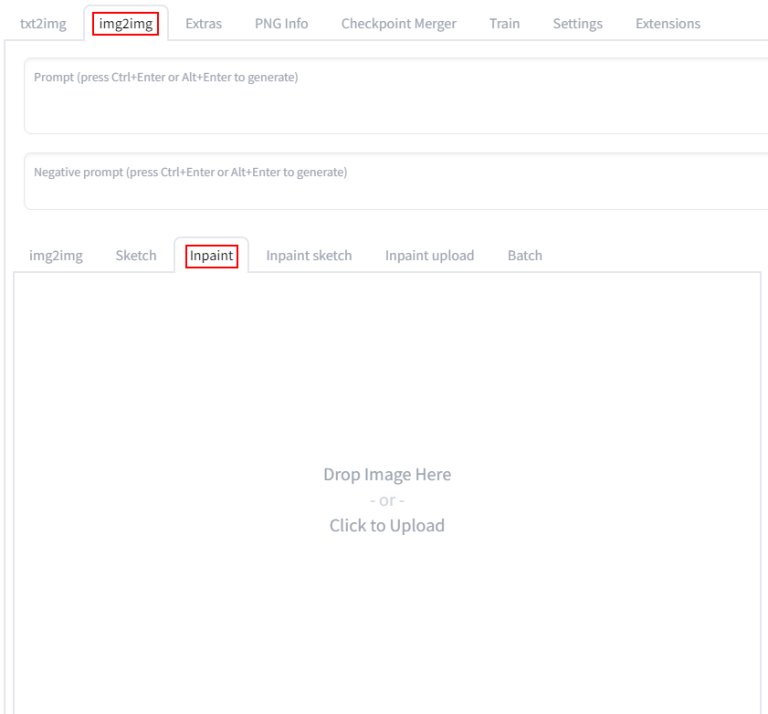
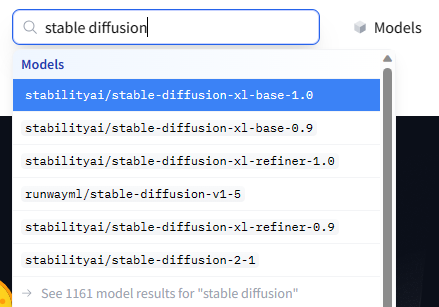
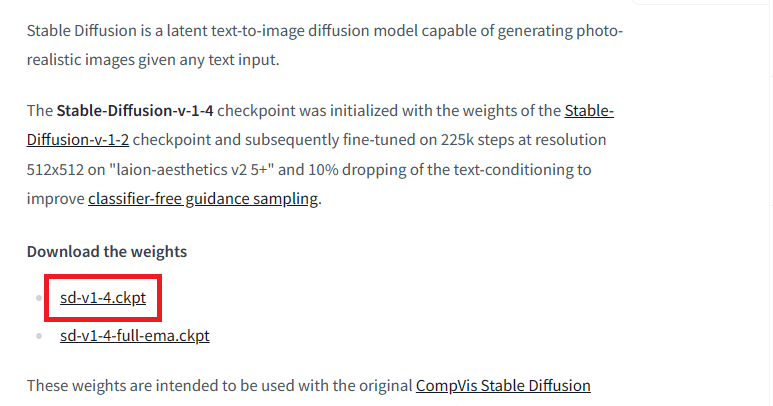
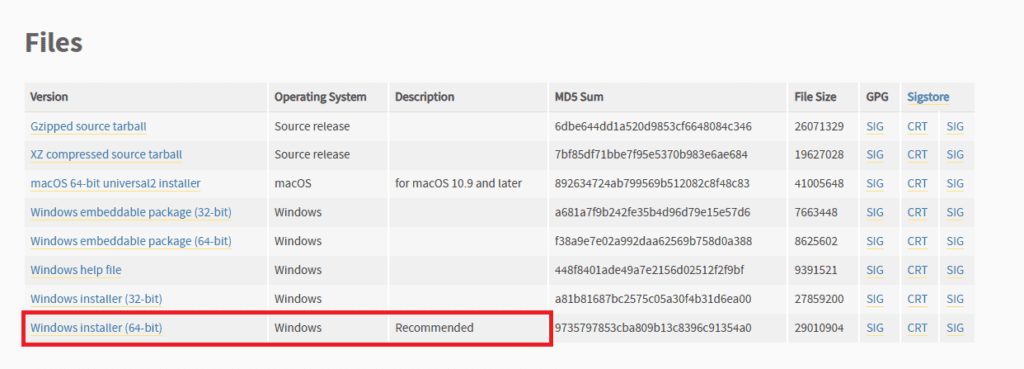
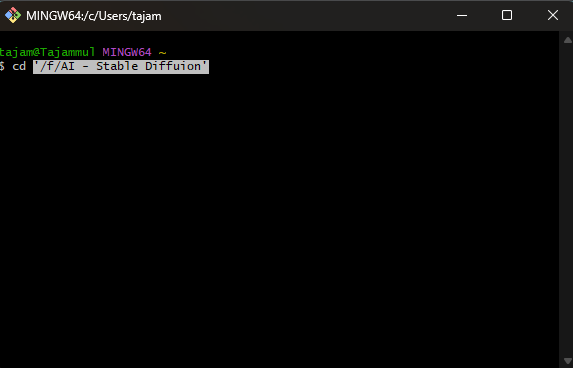
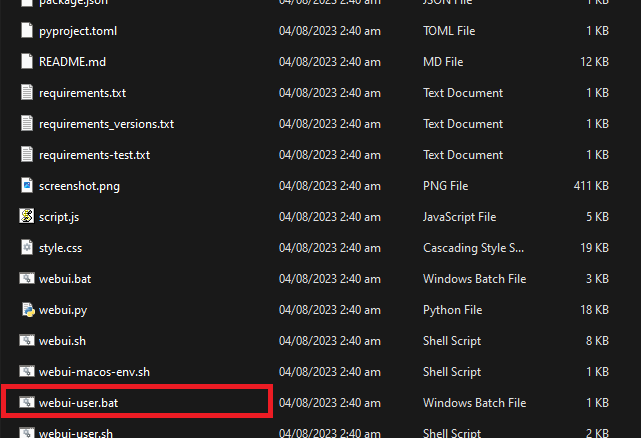
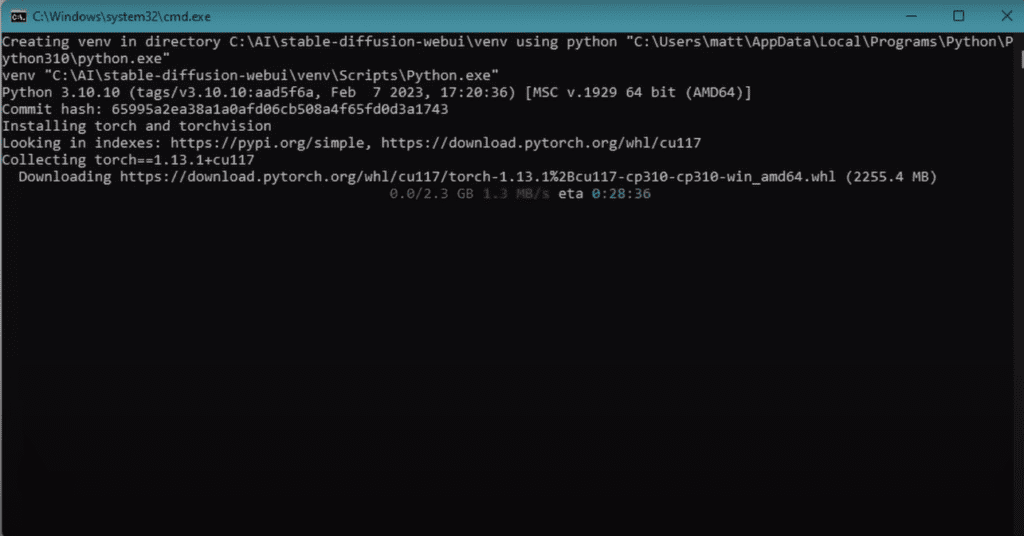
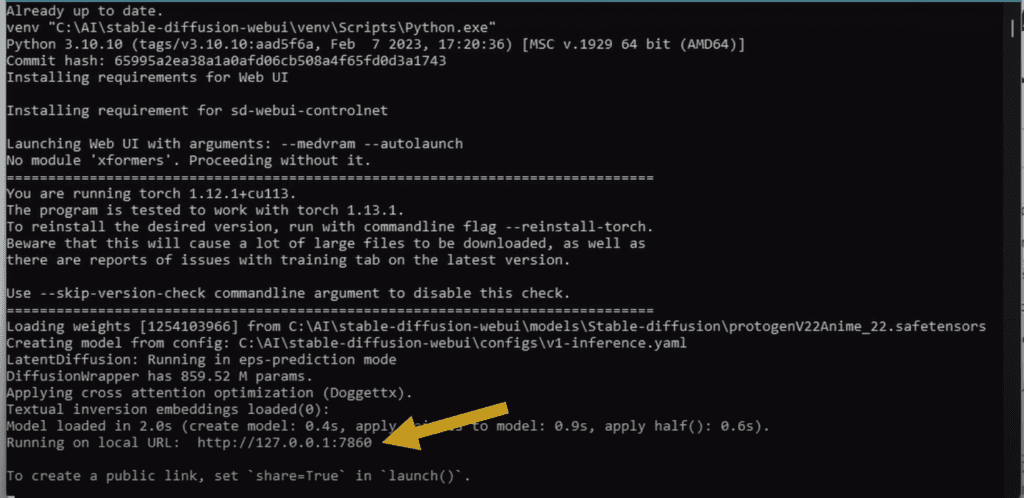
The first thing you need to experience Stable Diffusion men models is Stable Diffusion WebUI. Following a few simple steps, you can install Stable Diffusion on your own machine. Once you have installed Stable Diffusion on your PC, you can try these Stable Diffusion men models for ultimate creativity and fun.


Stable Diffusion Men Models

Here is the list of the 5 Best Stable Diffusion Men Models
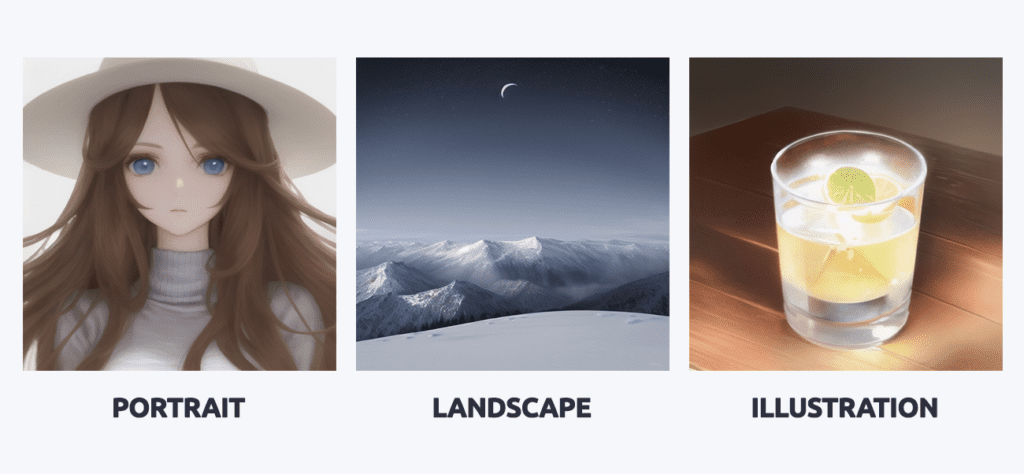
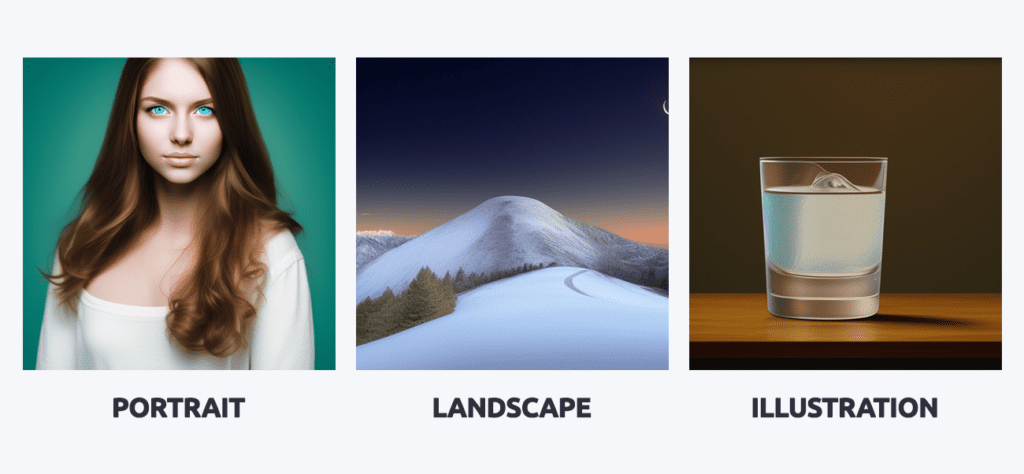
 

BlueBoys_2D

Stable Diffusion Men Model Blue Boys 2D

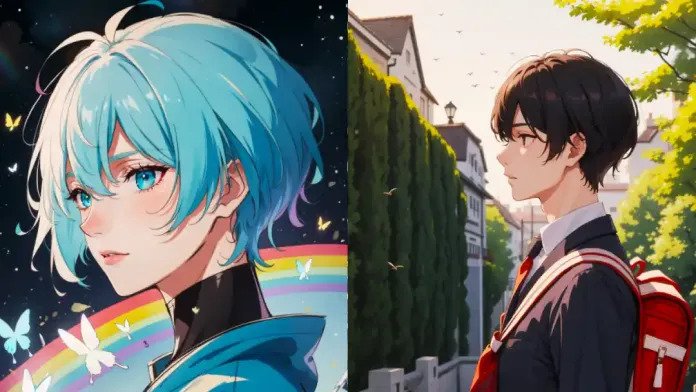
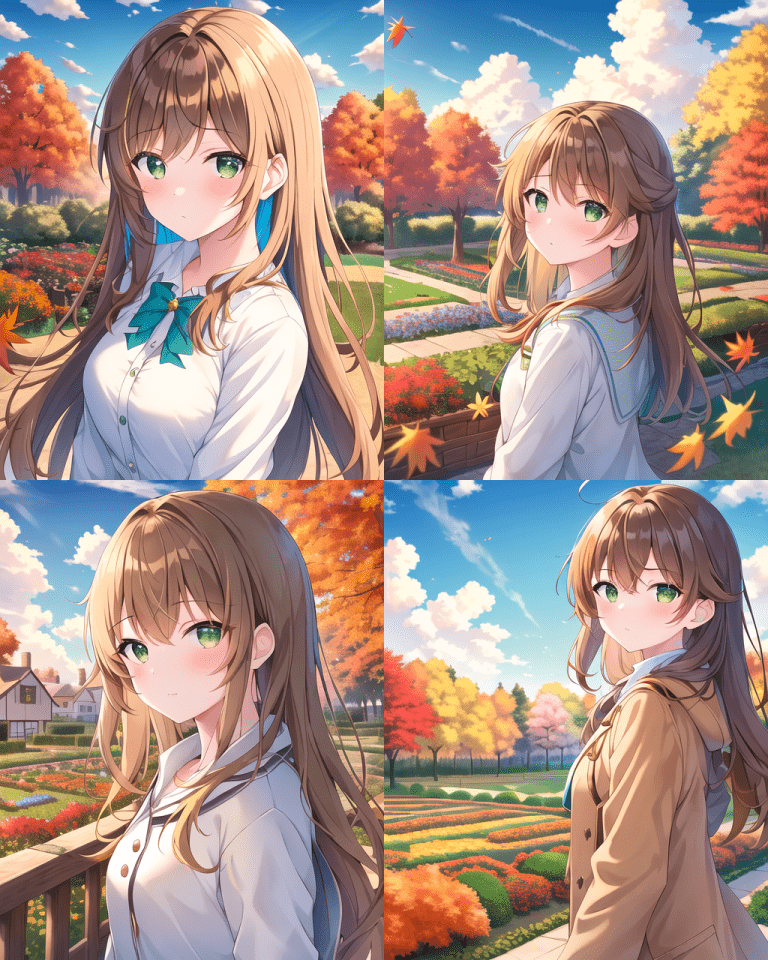
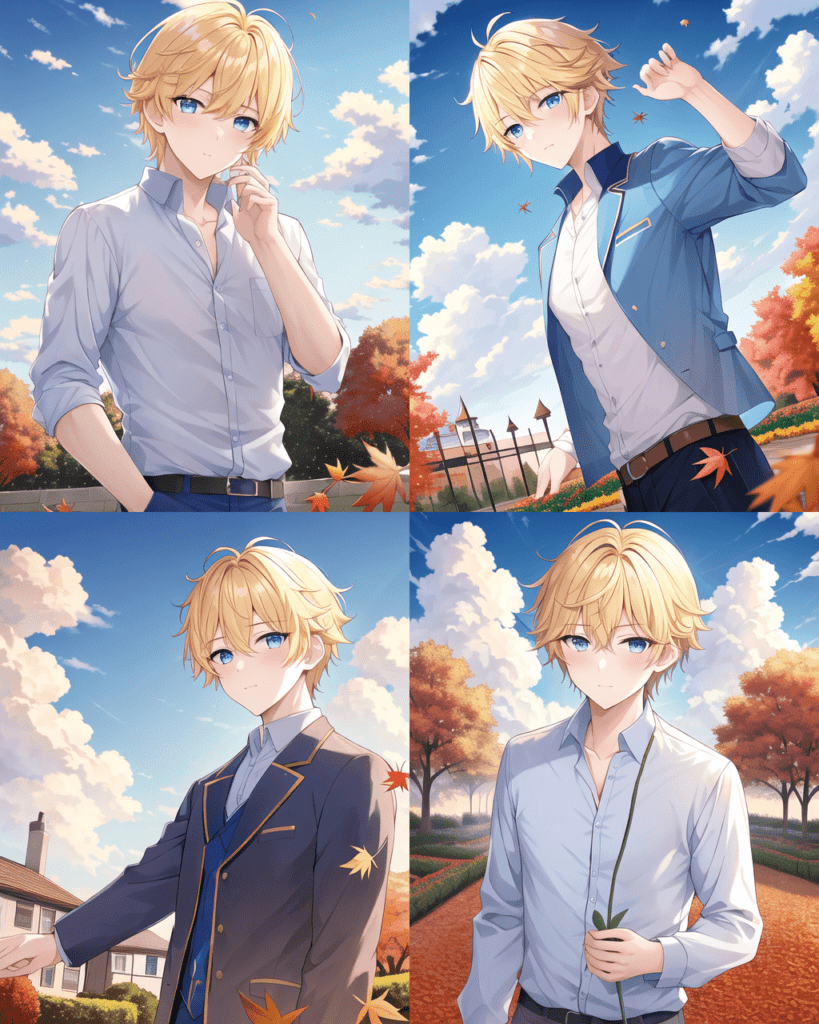
As the name suggests, this model creates 2D anime-style male images according to your input prompts. The model focuses on simple, clear, and flat 2D style designs with vibrant and clear colors. If you are a 2D anime fan, this model is going to be a good treat for you.

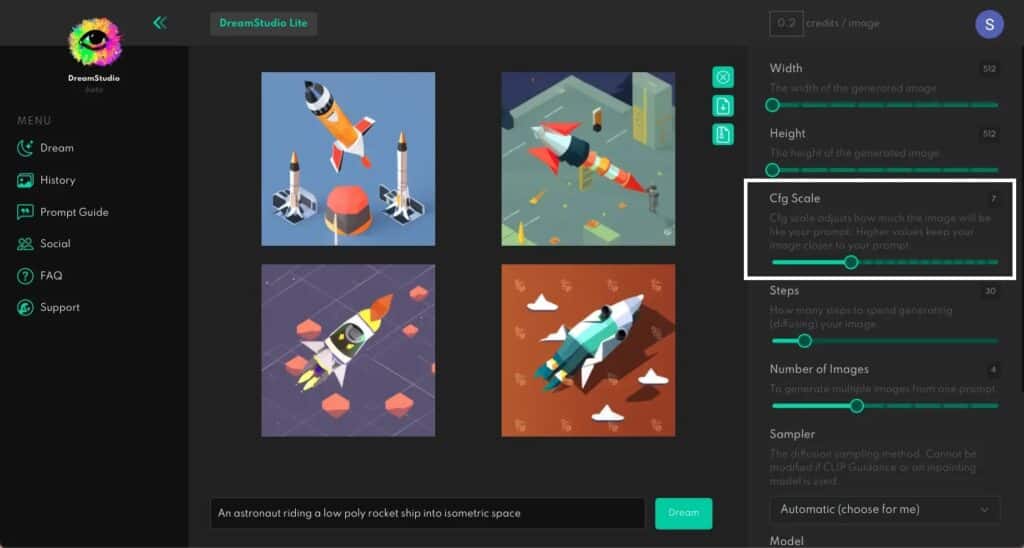
Here are a few recommended settings for BlueBoys_2D to best work for you. Keep sampling method of Eular a / DPM++ SDE Karras, a clip skip of 2, and Hires. fix upscaler of R-ESRGAN 4x+Anime6B. Additionally, a CFG scale of 7 to 11 and a VAE of vae-ft-mse-840000-ema-pruned / kl-f8-anime2 will work best in most of the cases.
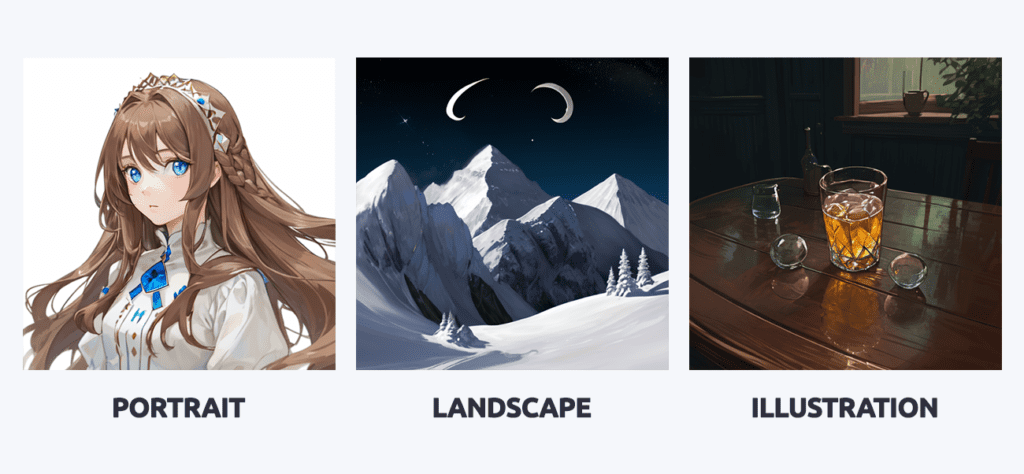
 

The Three Kingdoms

Stable Diffusion Men Model The Three Kingdoms

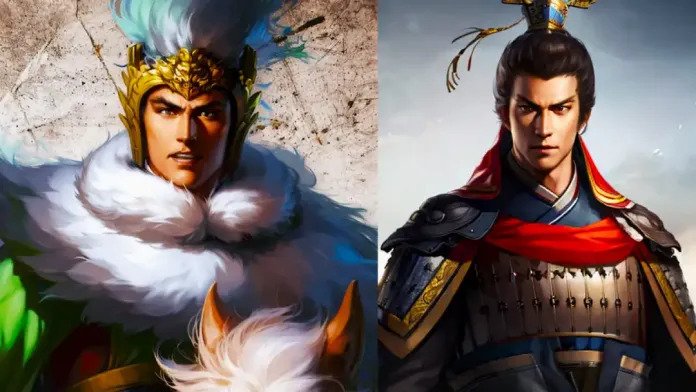
The Three Kingdoms is one of the best Stable Diffusion men models for those who love fairy tale, ancient, king-type characters. The model will provide you with an output of characters that are similar to classic villains or heroes.

One of the best parts is, that The Three Kingdoms is being updated on a regular basis. If you are not satisfied with the results of your initial attempts, you can always try later. Additionally, the model doesn’t need any trigger words, which makes it really user-friendly.
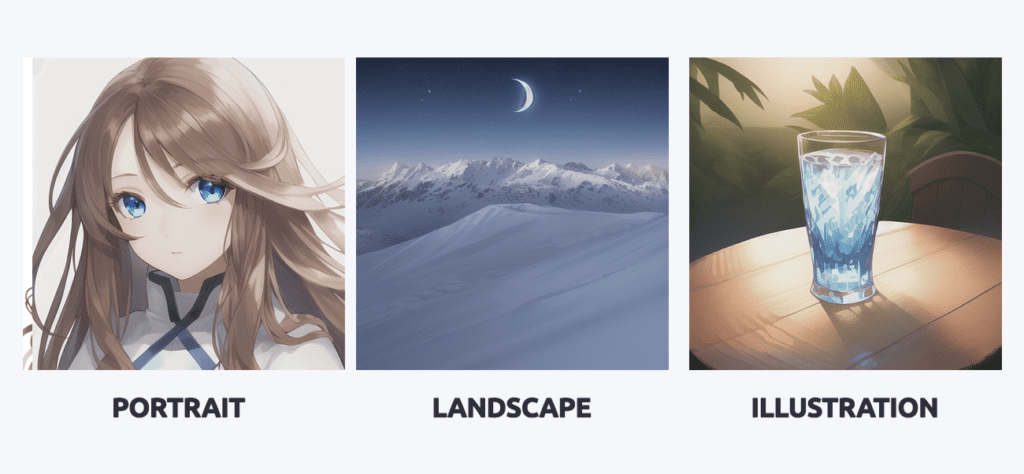
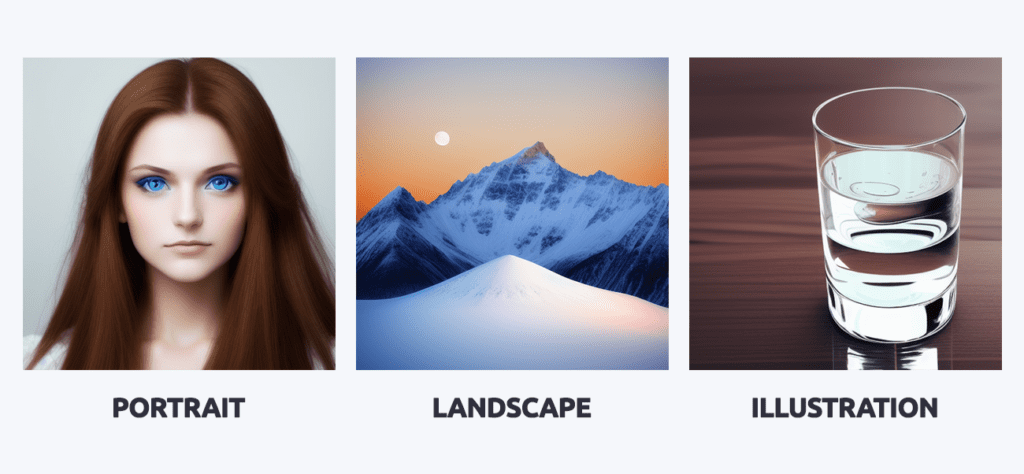
 

PastelBoys_2D

Stable Diffusion Men Model Pastel Boys 2D

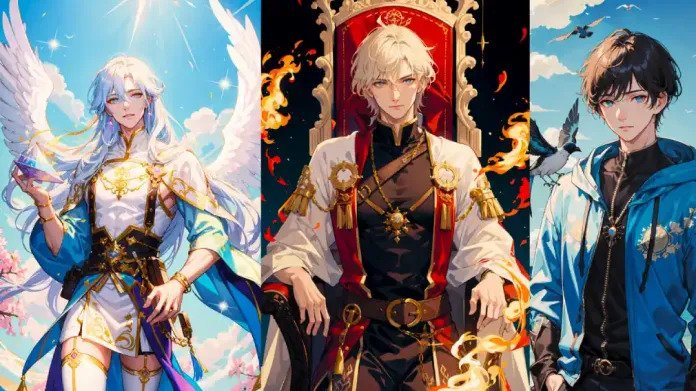
PastelBoys_2D is another powerful Stable Diffusion model which can amaze you with its results. It can be a fantastic utility if you are looking to generate a handsome anime male character. The model is better than its previous version, however, need some improvements in a few areas. Overall the model performance is impressive.

The best settings for the model to generate stunning outputs are as follows. Sampling method – Eular a / DPM++ SDE Karras, Clip skip – 2, Hires.fix upscaler – R-ESRGAN 4x+Anime6B, CFG Scale – 7~9, and VAE – vae-ft-mse-840000-ema-pruned / kl-f8-anime2.
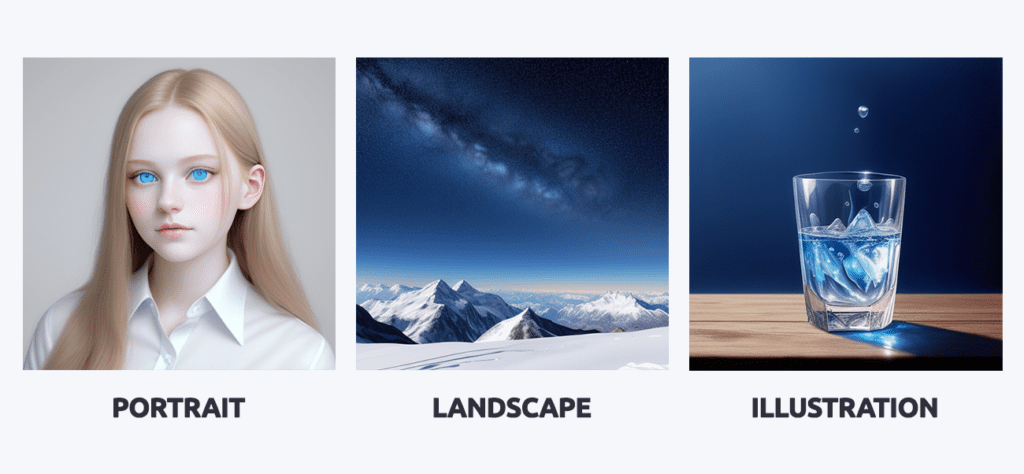
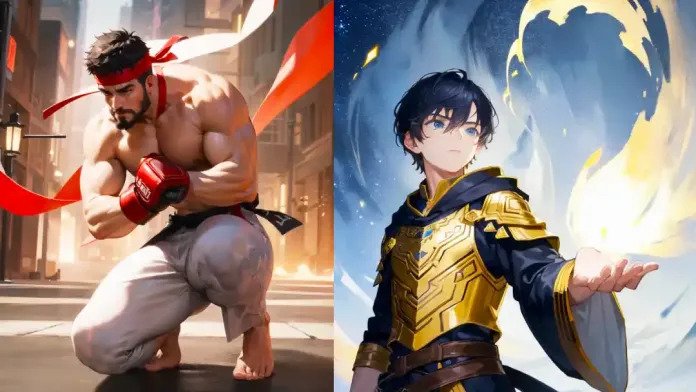
 

Pretty Boys

Stable Diffusion Men Model Blue Pretty Boys

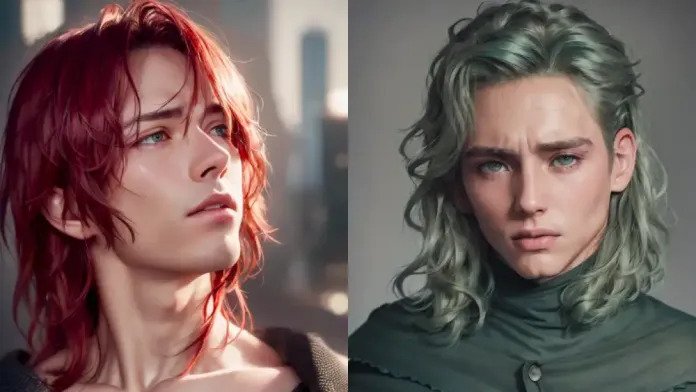
The Pretty Boys is the first realistic LORA Stable Diffusion men model which can help you create realistic male models. The AI model is trained to generate handsome faces without a beard. You can control the output of the model by using terms like Caucasian, Black, Asian, or Indian.

The Pretty Boys Stable Diffusion model is trained on Stable Diffusion 1.5. You can get better results if you use VAE sd-vae-ft-mse-original. You will need to update the WebUI by using git pull to use LORA’s in auto1111. It is worth noting the LORA file should be copied to stable-diffusion-webui/models/lora directory. The weight should be adjusted according to the instructions as well.
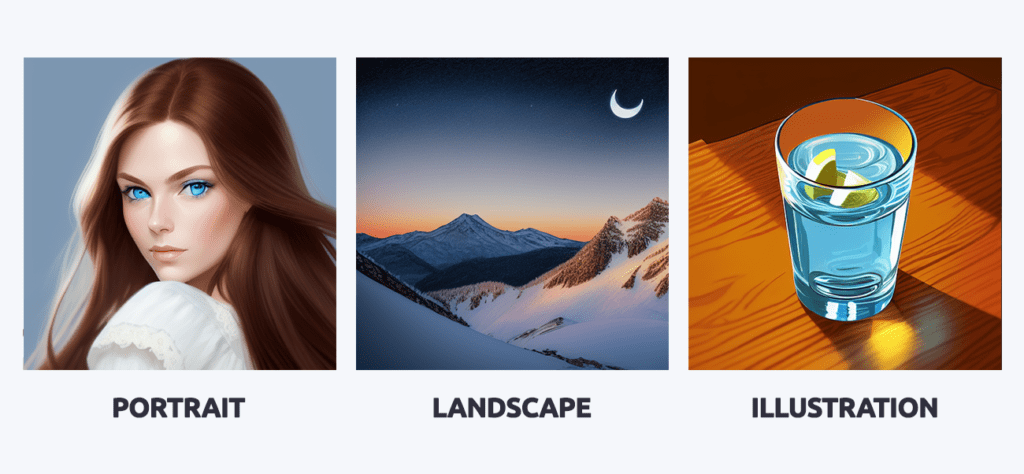
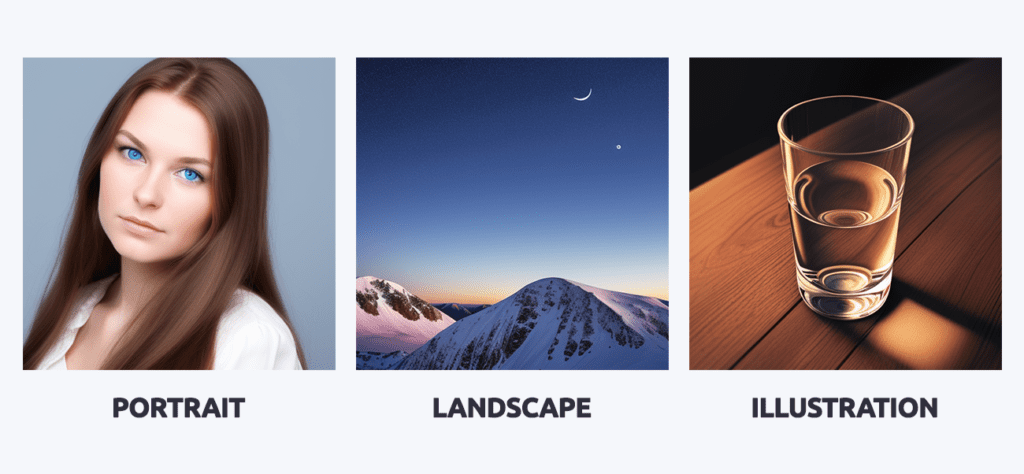
 

Refdalorange

Stable Diffusion Men Model Refdalorange

Refdalorange can create the male characters with a perfect balance between 2D and 3D design. Although the model is trained to generate male characters, it can also generate female characters pretty well. The model uses orangemix.pt VAE, which is very effective for generating high-quality character designs.

The feature that sets Refdalorange apart from other Stable Diffusion men models is it can generate male characters in almost every situation. You can create your character as a warrior, as a scholar, or anything you want.


Conclusion

Stable Diffusion is an ocean of amazing output production ranging from imaginative sceneries to realistic human characters. The AI model offers tons of models which can be used for custom generation purposes. If you are looking to generate some male characters, you got tens of Stable Diffusion men models. These models range from 2D to 3D to realistic male characters. Each model is discussed with its pros and cons in the blog.

Stable Diffusion Mask Blur Featured Image

Use Stable Diffusion Mask Blur & InPaint Feature to Alter the Specific Parts of the Image 2023

Stable Diffusion is an evolving text-to-image AI model that has recently been very popular. A few of its features set it apart from other similar AI models like Midjourney. One of these features is Stable Diffusion Mask Blur which you can use for inpainting the images. We will be discussing this feature further in this article. In detail, we will discover, how you can use this feature to boost your creativity and yield the desired results. So let’s get started!


What is Stable Diffusion Mask Blur?

In simple terms, if you want to change a specific part of an image, you can use that with the Stable Diffusion mask blur feature. Suppose you generated an image. You are overall satisfied with the result but there is one odd element that you want to alter in the whole image without interrupting the rest of the image. Here is where Stable Diffusion mask blur comes into play. Let’s discover in detail, how you can do that.


Lets Use Stable Diffusion Mask Blur

There are a few steps you will need to follow to successfully alter the desired part of your results. Follow along the steps to yield imaginative results.


Install Stable Diffusion WebUI

First, you will need some medium to use Stable Diffusion. The best option is to install Stable Diffusion on your own device. Make sure you follow the guide and get Stable Diffusion WebUI on your PC. Once done, you can move on to the next step.


Get an Input Image to Use in Stable Diffusion Mask Blur

Once you have installed Stable Diffusion WebUI, you have to find an image that you have to use as input. Probably you already have the image for what you are reading this article. However, in odd cases, if you don’t have the input image, you can generate one. Here are a few of the best Stable Diffusion prompts you can use to get started.

We will be using the following image. I am happy with the rocks and the trees but the water stream doesn’t appeal to me well. I want to make it more realistic. Here is where Stable Diffusion mask blur will be helpful. Let’s do it!

Smooth Stream Stable Diffusion Mask Blur


Getting Started with Stable Diffusion Mask Blur

Stable Diffusion Mask Blur Interface

Since you have got the image, let’s move on to our next step. Simply run the Stable Diffusion WebUI and you should see the interface like above. Head to the img2img section. By the way, you can turn your rough drawing into pure art using the img2img feature. However, coming back to our topic, in the img2img tab, select the inpaint sub-section below the prompts field.


Prompt

Turn and write down your imagination in the detailed description under the prompt section. Try to add as many details as you can.


Negative Prompt

Add everything you don’t want Stable Diffusion to add in the output image. Here are 600+ Stable Diffusion negative prompts to assist you.


Upload Input Image

Upload your input image in the “Drop Image Here” section. You can either drag and drop the image or simply click the box and browse the image from your PC.


Start Painting the Mask

Once you have imported the image, start painting on the areas you want to alter. Use the hard black circular brush. Everything under this mask, or say, under this painting is what Stable Diffusion will alter. The rest will remain the same. So make sure you paint carefully. Here is what our final mask looks like.

Stable Diffusion Mask Blur Black Mask


Generate the Mask

Once done, click on the “Generate” button. And you are done! Here is the result we got.

Stable Diffusion Mask Blur Final Output


Let’s compare the both images side by side to get a good idea of what we actually did!

stable diffusion img2img feature image

Use Stable Diffusion img2img Feature to Transform Your Hand Sketch into a Professional Art

Do you want to draw but lack the natural artistic capabilities? Stable Diffusion is here to help! Stable Diffusion img2img feature can amazingly turn your hand drawn sketches into professional work of art leaving the viewers astonished.

Stable Diffusion is popular text-to-image AI model which comes with a list of amazing features setting it apart from other AI models. One of these features is Stable Diffusion img2img (image-to-image). Further in this article, we will discuss this feature in details. We will see how it works, it’s benefits and more. So let’s dive in!


What is Stable Diffusion img2img Feature?

Stable Diffusion img2img (image-to-image) is a feature which allows you to provide an image as input along with a text command. This input image works as a guide for the output, accompanying the text command. Stable Diffusion only follows the style, color, and composition from input image.


How does Stable Diffusion img2img Feature work?

Stable Diffusion img2img feature takes image as input along with text command, and generates a result combining both inputs. Even if your input lacks vibrancy and details, Stable Diffusion can enhance it to produce amazing results aligning with the text command you provided.

We will use a rough hand drawn sketch of an apple in this blog as an example. We will discover how, along with a text command, we can use the following image as our input (the right one). And how it can turn out to be a perfect drawing (the left one).

Stable Diffusion img2img side by side comparision


Setting up Stable Diffusion img2img Feature

To use Stable Diffusion img2img, you will need to install Stable Diffusion GUI called Automatic1111. Follow this step by step guide on how to install Stable Diffusion GUI on your machine.


Enabling Color Sketch Tool

Once you have installed Stable Diffusion GUI, you will have to enable color sketch tool for the better working of Stable Diffusion img2img feature. By default, the color sketch tool is inactive. However, you can active it by following these steps.

  • Go to the location where you installed Automatic1111.
  • Head to “stable-diffusion-webui-folder”
  • Locate “webui-user.bat” file
  • Right click on the file and click “Edit”.
  • Now change the following line

set COMMANDLINE_ARGS=

to

set COMMANDLINE_ARGS=--gradio-img2img-tool color-sketch


  • If any argument already exists after the equal sign, add --gradio-img2img-tool color-sketch with a space in the beginning.

Double click the file to start the GUI.


Using Color Sketch Tool

To use color sketch tool, head to img2img tab. Set up the starting image on the canvas. Select color palette icon and then solid color button. You should see the color sketch tool as demonstrated below.

Stable Diffusion img2img Color Sketch Tool

Now you are free to draw anything you want!


Transforming a Rough Drawing in to Professional Image

We will be using an apple as a subject to transform a rough hand drawn image to a professional drawing. You need to follow these simple steps to go along.


1. Creating a Background

You can use a canvas of 512×512 pixels with either a white or black background as per your satisfaction.


2. Draw Your Subject

Now draw your subject in the canvas. We will be using an apple as a subject. Please note you don’t need to spend too much time drawing the subject. The main focus here is to provide Stable Diffusion img2img feature the colors and composition of the subject for the reference. Rest is up to Stable Diffusion. We draw something like this.

Stable Diffusion img2img sample image, drawing


3. Stable Diffusion img2img Feature

For Stable Diffusion v1.5 Model, select v1-5-pruned-emaonly.ckpt in checkpoint dropbox. You can also play around with other models.

Next up, you need to provide a prompt that best describes your imagination of the final image as accurately as possible. Here is the sample prompt used in our demonstration.

photo of perfect green apple with stem, water droplets, dramatic lighting

Then, use the settings demonstrated below.

stable diffusion img2img all settings


The two parameters you can play around are CFG Scale and Denoising strength. Getting started, set CFG scale to 11 and Denoising strength to 0.75.

Now, hit Generate to get the results. Here is what we got.

Stable Diffusion img2img result

You can experiment with CFC scale and Denoising strength after you have read the complete guide on CFG scale.

Once you are happy with the results you are getting, save the image.


Another round for Stable Diffusion img2img

If you are totally satisfied with your results, you can stop here. Otherwise, you can go for another round of img2img. This time, however, use the final image as your first sample and repeat the process. Here is what second round of img2img provided us as output.

Stable Diffusion img2img second round result

Use these 3 Methods Helpful Methods to Make Stable Diffusion Restore Faces

Artificial intelligence is becoming very popular nowadays. There is significant progress in the field of text to image technology . Images generated with AI are becoming increasingly realistic, and many applications use those images, from advertising to movies to video games. However, the problem with AI-generated images is that sometimes they can produce undesirable or unexpected results. For Example, the issue of faces being “messed up” or being distorted in images generated by a stable diffusion model.


Why are Faces Being Distorted on Stable Diffusion?

Stable diffusion is a model that is trained with a large dataset of images using a neural network to generate high-quality images. But, one of the limitations of this technique is that sometimes it produces “messed up” or distorted faces. The reason behind this is the neural network is not able to get the all details and variations in human faces, which causes unreal or distorted results.


How do Make Stable Diffusion Restore Faces?

Luckily, there are some ways to restore faces that have been “messed up” or distorted by stable diffusion. The most effective way to do this is by using the AUTOMATIC1111 stable-diffusion-webui. This is an open-source tool that is particularly designed to generate images with stable diffusion, and it offers multiple features and options for get the best possible results.


Restore Faces with AUTOMATIC1111 stable-diffusion-webui

Some features of the stable-diffusion-webui are:
• Inpainting:

You can fill missing or distorted parts of the image with this feature, such as eyes or mouth.

• Color correction

You can adjust the color of the image to get a more natural look using this feature.

• Image enhancement

You can sharpen the image and improve its overall quality.

• Face restoration

This feature allows you to improve faces in pictures using either CodeFormer or GFPGAN.

(You can find all of its features at this link.)


Stable Diffusion restore faces


For creating new images, you can just select the “Restore Faces” option in the menu:


Stable Diffusion restore faces


If you want to fix the eyes of an already existing image, just go to the “Extras” tab and upload your image.


Stable Diffusion restore faces


Set the impact (from 0 to 1) of CodeFormer or GFPGAN. You might need different configurations depending on the image.


Inpainting with AUTOMATIC1111 stable-diffusion-webui

Inpainting is a powerful feature of the AUTOMATIC1111 stable-diffusion-webui that lets you fill in distorted or missing parts of the image. This feature is specifically used for stable diffusion restore faces that have been “messed up” or distorted The inpainting feature lets you select the area of the image that you wish to fill in, and then this tool will automatically generate a new image that fills in the missing parts.

For this, go to the img2img tab and choose “inpaint”


Stable Diffusion restore faces


You select the eyes and the missing piece will be filled.


Stable Diffusion restore faces


The following configuration works well for me.


Stable Diffusion restore faces


How will Stable Diffusion Restore Faces without AUTOMATIC1111 WebUI?

To make stable diffusion restore faces without AUTOMATIC1111 stable-diffusion-webui, you can install the same tools CodeFormers and GFPGAN they used on your implementation.

Here you can find the huggingface/sczhou space doing stable diffusion restore faces using CodeFormers. And here is a tutorial by EdXD on explaining the use of GFPGAN.

Also Read: Here is How to Download and Install Stable Diffusion’s Anything V4.5 Model

What is CFG Scale in Stable Diffusion? Here is How You can Use it for Best Results

Ever heard of the CFG scale and wondered what is CFG scale in Stable Diffusion? Keep on reading to find out!

Stable Diffusion has recently been a very popular text-to-image AI model which leaves its users in surprise with its image generative capabilities. The benefit Stable Diffusion has is, it is open source and available to use with 1000+ models for anyone. This means you can install and run Stable Diffusion on your own machine.

Classifier-free guidance (CFG) scale in Stable Diffusion is another feature that makes it stand out of its competitive AI models. And that is today’s topic as well. In this article, we will be discovering what is CFG scale in Stable Diffusion, how it works, how you can use it to improve your experience with Stable Diffusion, and more! So let’s not wait any further.


What is CFG Scale in Stable Diffusion?

Classifier-Free Guidance scale or CFG scale is a parameter that determines the degree of similarity between user input and the generated image. Using the CFG scale, users can tweak the level of similarity, and the quality of generated image.


What is CFG Scale Stable Diffusion Meaning?

If you are still wondering what is CFG scale in Stable Diffusion, here is your answer. The simple CFG Scale Stable Diffusion meaning is, your generated images will be compared to the prompt you provided. The higher the CFG Scale will be, the more generated image will match your input. However, in that case, the quality of the image may be compromised.

For better-quality images, the CFG scale may be kept lower. But that may lead to decreased resemblance between the prompt and the generated image. It’s totally up to you. If you want the output to be more aligned with the input, you can choose a higher CFG scale. If you care about the quality and the resemblance doesn’t matter to you, you can go for a low CFG scale.


How to Use CFG Scale in Stable Diffusion

Here are some simple steps you can follow to use the CFG scale in Stable Diffusion

Choose your Platform

You can use the CFG scale on platforms like DreamStudio, Playground AI, or Lexica. Decide where you want to use the CFG scale.


Sign up or Log in

For DreamStudio or Playground AI, you will need to Sign up or log in. If you are using Lexica, you are good to go.

Enter your prompt.

Now you have to put in your imaginative prompt to get output from Stable Diffusion. If you are unsure about how to craft good prompts, here is a guide for you.

Locate CFG Scale

According to the platform you are using, you will need to locate the CFG scale.

In DreamStudio you can find the “CFG Scale” slider on the right-hand side.

What is CFG Scale in Stable Diffusion


For Playground AI, you will find CFG Scale as “Prompt Guidance” on the right-hand side.

What is CFG Scale in Stable Diffusion


For Lexica, you will find CFG Scale as a “Guidance Scale” after clicking the “Generate” button.

What is CFG Scale in Stable Diffusion


Adjust the CFG Scale

The next step is to adjust the CFG scale value according to your preferences. As discussed earlier, you can use a high CFG scale value for more resemblance of the prompt and output, while compromising on the quality, and vice versa.


Generate the Image

Once you have set the scale as per your preferences, you can generate the image. You will find the button to generate the image according to the platform you are using. It can be “Generate”, “Dream” or anything else.


What is the best CFG Scale Value?

The best CFG scale value depends on your requirements. However, the optimum value is said to be around 7 to 11. You can set the value according to your preferences.


Conclusion

Stable Diffusion is one of the most popular text-to-image AI models which comes with some extra and handy features. One of these features is the CFG scale. In this article, we talked about what is CFG scale in Stable Diffusion, how it works, and how you can use it for the best results for your images.


Here is How to Download and Install Stable Diffusion’s Anything V4.5 Model

If you are into Stable Diffusion models, you must be familiar with one of the best Stable Diffusion anime models, Anything V3. You will get to know some insights about the model as we proceed further in the blog. Moreover, you will learn what is Anything V4.5 Stable diffusion model, how to download it, and install on your machine. If you love anime, you are in for a treat. So let’s get started!


The Origin of Anything V3 and Anything V4.5 Stable Diffusion

Anything V3 model is famous for its fantastic output in the anime genre. It is considered one of the best anime Stable Diffusion models to exist. Surprisingly, very few people know where it came from. Someone from China anonymously launched it over the internet. Despite its popularity, no one claimed to be its creator.

Building on this, someone took Anything V3 a step further, leading it to Anything V4, and eventually Anything V4.5 Stable Diffusion. So it’s obvious, Anything V4.5 Stable Diffusion wasn’t developed by the creator of Anything V3. Instead, it is developed by someone who used the existing source code of Anything V3.


Anything V3 Vs Anything V4.5 Stable Diffusion

Here is a demonstration of how both models are practically different from each other. While they share similarities, you will notice more details in the Anything V4.5 model.

anything v3
Anything V3 – PC: Pirate Diffusion
anything v4.5 stable diffusion
Anything V4.5
Anything V3 A
Anything V3 A
Anything V4.5 A
Anything V4.5 A

How to Download and Install Anything V4.5 Stable Diffusion

To download Anything V4.5 Stable Diffusion, you have to follow these simple steps.

  • Got to Hugging Face and Login.
  • If you don’t have an account, sign up.
  • Search for “Anything V4.5” in the search bar.
  • Choose the “Airic/Anything-V4.5”

Airic/Anything-V4.5 Stable Diffusion

  • Head to Files and Versions Section.
  • Download your preferred model format (.ckpt or .safetensor).
  • Check out the difference between the model formats here.
  • Click here to check out the step-by-step guide on how to install the model on your PC.

Conclusion

Anything V3 is considered to be one of the best anime Stable Diffusion models ever. It was originally launched by someone in China anonymously. Taking it to the next step, the Anything V4.5 Stable Diffusion model was launched recently. Some of the differences between the two are demonstrated in the blog. Additionally, you can download and install Stable Diffusion on your machine by following few simple steps shared in the blog.

10 Best Stable Diffusion Models You Should Try Now!

Stable Diffusion is a popular text-to-image model which can convert your imaginable words into images. As the technology is maturing, the outputs generated by the model are improving. To add, Stable Diffusion comes with 1000+ models which are trained with custom approaches. In this article, we will discuss what Stable Diffusion models are, and how they work. I will also share list of 10 Best Stable Diffusion models you should try. So with a lot of excitement, let’s get started!


What is Stable Diffusion Model?

In simple words, a Stable Diffusion model works on a next level customization demanded by user. For example, if you want to generate an anime art using Stable Diffusion, there is a separate model for it. Similarly, you get a dedicated model for generating oil painting art in Stable Diffusion.

In this way, dedicated models provide full customization for users. Further in the article, I have provided top 10 best Stable Diffusion Models that are worth trying. So make sure to read till the end.


Difference between “.ckpt” and “.safetensor”

Machine learning models use model data files to store the information they learn. There are two types of model data files, “.ckpt” and .safetensor. As the safetensor models does not use pickle modules to process they are relatively safer.

However, the pickle model in .ckpt file is vulnerable to exploiters and threat actors. So if you are going to use .ckpt model, make sure to get it from a trusted source.


10 Best Stable Diffusion Models

Now let’s discuss each of the best Stable Diffusion models one by one.

AbyssOrangeMix3 (AOM3)

abyssmodel best stable diffusion model

PC: SoftwareKeep

AbyssOrangeMix3 is an amazing Stable Diffusion Model which produces the best results with minimal prompting. If you are into less realistic, anime-style illustrations, this model is for you.

You don’t need to provide too many details for your prompt. Providing generic arguments in your prompt will amazingly generate detailed results for you. If you are


Anything V3

best stable diffusion models
PC: SoftwareKeep


Anything V3 is a model trained for “Anime Style” image generations. This is one of the best Stable Diffusion models which fall under the Anime genre. Anime fans can enjoy creating detailed and stunning anime illustrations using this model.

On issuing a simple prompt of a girl, the model generated a young anime girl with its illustration-based style without requiring any additional or specified details. If you are an anime addict, you can enjoy generating your imaginative characters.


DreamShaper

best stable diffusion models
PC: SoftwareKeep

DreamShaper is more of an illustration model which generates amazing illustration artwork through your imaginative words. The DreamShaper is also able to create stunning landscapes with vibrant colors. If you are looking to create illustrations using AI, DreamShaper can be one of the best Stable Diffusion models for you can go for.


MeinaMix

PC: SoftwareKeep

This is yet another model for creating stunning anime characters from your imaginative thoughts. MeinaMix is similar to Anything V3, however it is good in creating more complex illustrations with distinct painting quality.

This model is a collection of several other models. It generates output using information from other different models. So you can get the best output from all the relevant models.


Elldreths Retro Mix

PC: SoftwareKeep

This model is inspired by vintage artwork and uses a combination of colors, shapes, and textures to create the perfect retro vibe for your artwork. So if you are a fan of retro and vintage artwork, Elldreths Retro Mix is one of the best Stable Diffusion models for you.


OpenJourney

PC: SoftwareKeep

As the name suggests, this model is inspired by MidJourney AI. This model mainly focuses on creating realistic and stunning images. However, it is important to note that the more detailed prompts you will provide, the more realistic the output will be.

If you are a fan of MidJourney but can’t afford it for some reason, this model is absolutely for you. Moreover, you can check out the differences between MidJourney and Stable Diffusion here.


Protogen

PC: SoftwareKeep

Protogen is yet another Stable Diffusion model which focuses on creating realistic images. It is more focused on generating people instead of things, or landscapes. The model uses a machine-learning strategy that focuses more on fine-tuning the lesson instead of making sweeping adjustments to the output.

If you are looking to create stunning and realistic human faces, this is undoubtfully the best Stable Diffusion model for you.


Deliberate

PC: SoftwareKeep

According to the creator of this model, you can generate anything you want with this model. You have to provide a detailed prompt for this model to give you optimum performance. Deliberate blends digital art and realism to provide realistic outputs.


Realistic Vision

PC: SoftwareKeep

As humans, we are subconsciously trained to recognize imperfection or unrealism. For a machine, it is hard to produce something that is way too realistic for us. However, realistic vision is a model which uses all the mechanical powers to generate realistic images from our input. This model will produce almost perfect output according to your prompt.


Modelshoot

Best Stable Diffusion Models
PC: SoftwareKeep

Modelshoot generates amazing output from simple inputs. The output from this model seems like it is a photograph captured by a premium camera. If you are looking to generate such images with AI, Modelshoot can be one of the best Stable Diffusion models for you.

Step by Step Guide to Install Stable Diffusion on Windows 10

Are you tired of using Stable Diffusion on Discord? Do you want to push your creativity limits? Well, you are in the right place. In this blog, we will learn how to install Stable Diffusion on Windows 10 and 11. We will cover the topic in detail and will go through all the steps one by one. So without waiting any further, let’s get started.


System Requirements to Install Stable Diffusion on Windows 10

To run Stable Diffusion on your PC, your system needs to match the following requirements:

  • Any good AMD or Intel CPU.
  • A minimum of 16 GB of RAM.
  • At least 256 GB SSD.
  • At least 10 GB of free disk space.
  • A GeForce RTX GPU with a minimum of 8 GB of GDDR6 memory.


What you will need?

Here is the list of things you will need to install Stable Diffusion on Windows 10.


Hugging Face Account

First of all, you will need an account on Hugging Face. You can create one for free by simply clicking here and entering the relevant information.


GitHub Account

The second thing you will need is an account on GitHub. You can create it for free too. Just click here and sign up by following the on-screen instructions.


Stable Diffusion Models

You will need to download the Stable Diffusion model from Hugging Face. For that, head to the Hugging Face, and in the search bar, type “stable diffusion”. You will see different models.

how to install stable diffusion on windows 10

Each of them is a bit different from each other. You can discover details about each model on the Internet. However, for this tutorial, I installed the Stable Diffusion v1.4 Original model.

You can search for the same model on hugging face, or simply click here. Under “Download the weights” click on “sd-v14.ckpt” and it should start downloading the model.

how to install stable diffusion in windows 10

Git for Windows

The next thing you will need is a software called Git for Windows. If you are familiar with Linux OS, you must have heard the command “git clone”. That is exactly what this software is going to do for us in Windows.

To download the software, simply click here. Click on the Download button and the software should start downloading.

Once the software is downloaded, double-click on the setup to install it and complete the installation process by following the on-screen instructions.


Python

The next thing you will need to install Stable Diffusion in Windows 10 is Python programming language. For that, click here and scroll down until you see “Files”. Click on “Windows Installer | Windows | Recommended” as shown below.

how to install stable diffusion on windows 10

It will start downloading Python for you.

Once the downloading is completed, double-click on the Python setup file and install it by following the on-screen instructions.

That was all we needed to install Stable Diffusion on Windows 10.

Now let’s begin installing Stable Diffusion.


Location to Install Stable Diffusion on Windows 10

First of all you need to define the location where you want to install the Stable Diffusion. Remember, you will need at least 10 GB of free space to install the software. It is highly recommended to install it in an SSD for better performance.

Once you have decided where to install Stable Diffusion, simply create a new folder in that location. You can name it whatever you want. For this tutorial, we will name it “AI – Stable Diffusion”. Now copy this folder


Changing Directory

Now open Git for Windows and type cd[paste]. Replace Paste with the directory of the “AI – Stable Diffusion” folder by right-clicking and selecting “Paste”. It will change Git for Windows directory to the folder where we want to install Stable Diffusion in Windows 10.

how to install stable diffusion on windows 10


Cloning Stable Diffusion in Windows 10

Now, you will need to clone Stable Diffusion 1111 in your Windows. For that, visit this link and click on “Code”. You should see the “Copy” button next to the code. Simply click this button, or just copy the code directly from here  https://github.com/AUTOMATIC1111/stable-diffusion-webui.git.

Now go back to Git for Windows and issue this command  “git clone [code]”. Replace [code] with the code you just copied.

Hit Enter. It will take a minute or so. Wait for it to be completed.


Putting in Checkpoints

Now copy the sd-v14.ckpt you downloaded earlier and head to the “AI – Stable Diffusion” folder. Navigate to the path “Location\AI - Stable Diffuion\stable-diffusion-webui\models\Stable-diffusion”.

In this folder, you will see a text file saying “Put Stable Diffusion checkpoints here”. Paste the file you copied earlier.


Downloading Torch

Navigate to the path “Location\AI - Stable Diffuion\stable-diffusion-webui” and scroll to the end until you see this file called “webui-user.bat”.

how to install stable diffusion on windows 10

Double-click this file and it should initiate the download. Wait for it to be completed.

how to install stable diffusion on windows 10


Here You Go!

Once that’s completed, you should see “Running on Local Machine” and a web address next to it.

How to Install Stable Diffusion on Windows 10

Simply copy the address and paste it into a new tab in your browser.

Bingo! You are inside the Stable Diffusion Web UI.

You can generate anything that you imagine without any restrictions! There are a lot of settings that you can play around to find the best for you.

If you are looking for amazing prompts to get started with, here they are. Additionally, if you run into any error while running Stable Diffusion on your PC, you can find a solution here. If you encounter a “Cuda out of Memory Error”, here are 7 ways to resolve that error.


stable diffusion cuda out of memory

Here are 7 Ways to Fix Stable Diffusion Cuda Out of Memory Error

Using Stable Diffusion on your PC is highly productive and a enjoyable. However, some people may encountered the “Stable Diffusion Cuda out of Memory Error”. This error can be really frustrating as it can interrupt one’s artistic productivity. If you are one of those people, worry not. I will be sharing 7 effective ways to fix this error and keep going on with your creativity. So without waiting any further, let’s begin.


Stable Diffusion Cuda out of Memory – Restart Your PC

stable diffusion cuda out of memory

If previously, you didn’t have any problem running Stable Diffusion, there are chances that a simple system restart will fix this error. Sometimes the connection between Stable Diffusion and GPU may have been lost, and restarting fixed the issue according to many users. reported, a simple restart fixed [] this issue for them.


Lower Resolution Images

Many users were able to fix Stable Diffusion Cuda out of Memory error by generating low-resolution images. If your machine has low VRAM try generating low-resolution images like 512×512 or 256×256. For machines with less than 4GB VRAM, even lower resolutions may work fine. It’s worth noting that this may affect the image quality.


Reduce Sample Size to One

By default, Stable Diffusion provides you with multiple image results for a single prompt. However, if you are facing Stable Diffusion Cuda out of Memory error, you can try generating a single sample.  You can do that by simply adding “–n_samples 1” in your prompt. This method was useful for many users.


Install Anaconda alongside NVidia Cuda Toolkit

Installing and running Anaconda is another workaround that was suggested by many users to fix the Stable Diffusion Cuda out of Memory error. For those unfamiliar with Anaconda, it is an open-source environment management system used for installing and running packages for Python. Download the NVidia Cuda toolkit and follow the instructions on the relative GitHub repository to ensure Stable Diffusion works seamlessly.


Checking Your GPU Memory.

For the best result from Stable Diffusion, it is highly recommended to use a system with VRAM of at least 6GB. However, you can also go with 4GB of memory. But going below 4GB will lead to cuda out-of-memory error. So it is highly recommended to use Stable Diffusion on a system with at least 6GB of VRAM.


Edit the webui-user.bat File with Optimized Commands

webui-user.bat is the file that is used to run all the commands on Stable Diffusion. You can edit this file to use optimized commands which will allow Stable Diffusion to work more efficiently. Follow this simple guide to do so

  • Open the location where you have installed Stable Diffusion.
  • In the location, you should see this file called “webus-user.bat”.
  • Simply right-click on this file and click Edit.
  • Here you can add different arguments and find out which one works for you.
  • You can find all these arguments here.


Use an Optimized Version of Stable Diffusion

If you are still encountering the “Stable Diffusion Cuda out of Memory” error, consider using an optimized version of Stable Diffusion. In case you are using the original Stable Diffusion on your machine, you can simply download the optimized version and paste the contents in the “stable-diffusion-main” folder. You can refer to the detailed tutorial for further details.

stable diffusion cuda out of memory


Conclusion

Stable Diffusion is the only Image-to-Text AI model which can be installed on your PC. However, it comes with a lot of errors as every system has different hardware properties. Stable Diffusion Cuda out of Memory is one of the frustrating errors. However, there are many workarounds to fix this error. You can try restarting your system, generating low-resolution images, generating only one sample, and many more. Explore the full article to find out which solution works best for you.

Here is the Solution to these 5 Frustrating Stable Diffusion Errors

Text to Image AI technology is pretty popular these days. Some known players of this game are MidJourney, DallE, and Stable Diffusion. Unlike DallE and MidJourney, you can install and run Stable Diffusion on your own machine, given it matches the system requirements for the AI model. However, it’s common for users to face Stable Diffusion errors while running it on their machines.

Well, if you are one of the users facing these errors, you are at the right place! In this article, we will explore some common Stable Diffusion errors which can stop you from generating some amazing art. We will also see how you can fix these Stable Diffusion errors so you can keep using the AI model without any further barrier. So without waiting any further, let’s dive in!

Fixing Stable Diffusion Errors

For any of the Stable Diffusion errors demonstrated below, you will have to browse to the location where you have installed the Stable Diffusion Web-UI. Once you are at the right location, look for “webui-user.bat”. Right-click on the file and click “edit”. Next, add the respective arguments to “set COMMANDLINE_ARGS=” as demonstrated below:

stable diffusion error

You can find all command line arguments and settings here.


Black Image Error

Black Image is one of the major Stable Diffusion errors which can be annoying at times. However, here is an effective fix for that as well.

Using --disable-nan-check can cause this error, however, persisting the command may result in a normal image.

For NVIDIA GPU, use --xformers to solve black image generation. It is worth noting, you will have to install “xformers”. For that, simply open the terminal by pressing shift + right click and clicking “Open PowerShell window here”. In the terminal, type pip install xformers.

Another way to solve this error is by adding --no-half to the command-line arguments. Usually, this argument can be used with--precision-full or  --precision-autocast. Both --no-half and --precision-full combined, force stable diffusion process in 32-bit floating-point numbers (fp32) instead of cut-off 16-bit floating-point numbers (fp16).

If you wish the opposite processing, you can use --precision-autocast which will then use fp16 wherever possible. Using full precision can possibly give you better results. But as a tradeoff, it will take a bit longer. Stable Diffusion by default uses fp16 wherever possible, to speed up the process, despite the fact that there is less possible variation in outcomes.


Unable to Load “safetensors”

If you are unable to load “safetensors” models,  here is the fix. Simply add the following command in “webui-user.bat”:set SAFETENSORS_FAST_GPU=1

It’s worth noting that you will not be able to use safetensors while using --lowramoption argument. On doing so, you will get the following error:

stable diffusion errors


Not Enough Memory

stable diffusion errors

Another Stable Diffusion error is “Not Enough Memory”, which occurs when you are running Stable Diffusion on a machine with low VRAM. If your machine has 4 to 6GB of VRAM, adding –lowvram to the command-line arguments will surely fasten the process. If you are running Stable Diffusion on a machine with 8GB of VRAM, add –medvram instead.

Using these commands will prevent the “Not Enough Memory” error from occurring. Your machine’s memory will be conserved at the cost of a slower generation. If the error still persists even after adding the above commands, this means you will have to remove a few of the other options that you added before. You can also add --no-half, if you haven’t already.


NansException

stable diffusion errors

On getting the above error, you have to use --disable-nan-check with the other command-line arguments, as mentioned. There are chances that you might encounter this error if you use --opt-sub-quad-attention.


Bonus Tips for Better Performance

For running Stable Diffusion on an NVIDIA GPU, it is recommended to install –xformers. We have already discussed how you can do that. xformers will boost Stable Diffusion performance on your machine.

Starting without any of the above-shared arguments can result in faster processing of the images. However, when you encounter any error, you can progressively add the arguments as per the requirements. In my case, along with –xformers, I started with –medvram only, as I have 8GB of VRAM. Later, I added--opt-sub-quad-attention for better performance.

--opt-split-attention or --opt-split-attention-v1 can also be used along with --opt-sub-quad-attention or separately. --opt-sub-quad-attention is considered better than --opt-split-attention for AMD GPUs. However, NaNsException happened to occur on using this, so I added --disable-nan-check.

But after adding that, stable diffusion started to generate black images. To fix that, I had to add --no-half and --precision-autocast.

After using the above shared arguments, never had an error as of writing this article.


Conclusion

Text-to-image AI technology is pretty popular these days. As Stable Diffusion is open source, it is a bit different than other AI models of its type like MidJourney, and DallE. However, installing Stable Diffusion on your own machine comes with some errors which can be frustrating at times. This blog provides you with a list of Stable Diffusion errors with their solution which can keep you going.

Scroll to Top