Stable Diffusion is an evolving text-to-image AI model that has recently been very popular. A few of its features set it apart from other similar AI models like Midjourney. One of these features is Stable Diffusion Mask Blur which you can use for inpainting the images. We will be discussing this feature further in this article. In detail, we will discover, how you can use this feature to boost your creativity and yield the desired results. So let’s get started!
What is Stable Diffusion Mask Blur?
In simple terms, if you want to change a specific part of an image, you can use that with the Stable Diffusion mask blur feature. Suppose you generated an image. You are overall satisfied with the result but there is one odd element that you want to alter in the whole image without interrupting the rest of the image. Here is where Stable Diffusion mask blur comes into play. Let’s discover in detail, how you can do that.
Lets Use Stable Diffusion Mask Blur
There are a few steps you will need to follow to successfully alter the desired part of your results. Follow along the steps to yield imaginative results.
Install Stable Diffusion WebUI
First, you will need some medium to use Stable Diffusion. The best option is to install Stable Diffusion on your own device. Make sure you follow the guide and get Stable Diffusion WebUI on your PC. Once done, you can move on to the next step.
Get an Input Image to Use in Stable Diffusion Mask Blur
Once you have installed Stable Diffusion WebUI, you have to find an image that you have to use as input. Probably you already have the image for what you are reading this article. However, in odd cases, if you don’t have the input image, you can generate one. Here are a few of the best Stable Diffusion prompts you can use to get started.
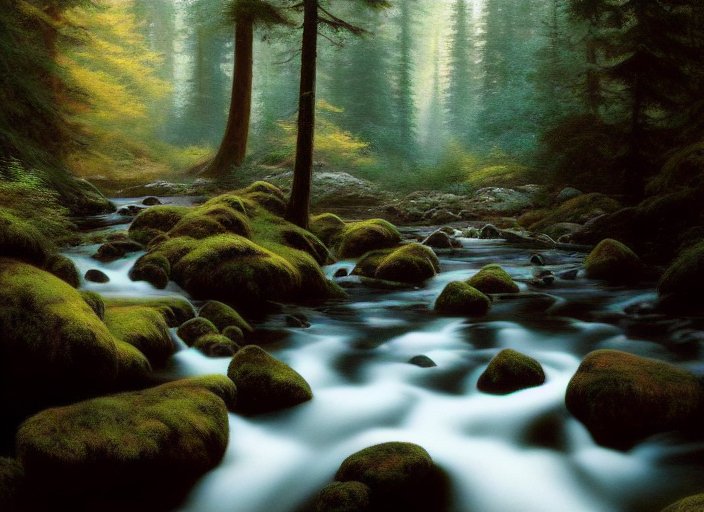
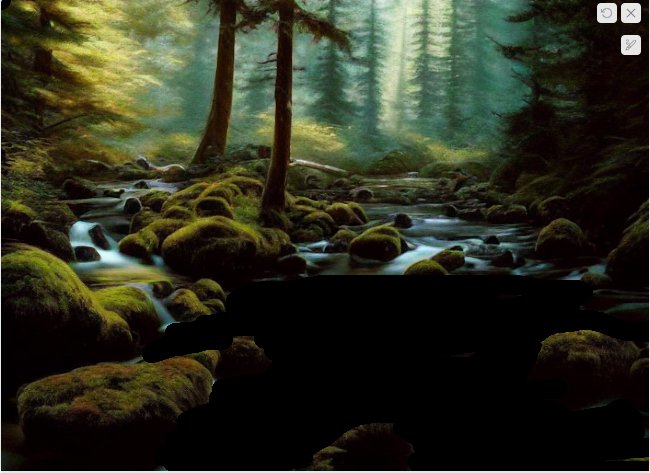
We will be using the following image. I am happy with the rocks and the trees but the water stream doesn’t appeal to me well. I want to make it more realistic. Here is where Stable Diffusion mask blur will be helpful. Let’s do it!

Getting Started with Stable Diffusion Mask Blur
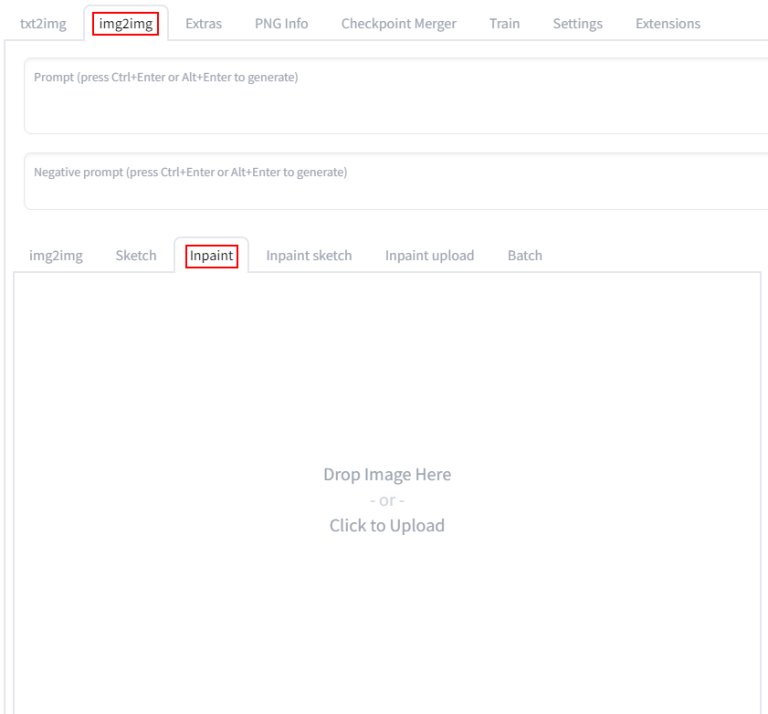
Since you have got the image, let’s move on to our next step. Simply run the Stable Diffusion WebUI and you should see the interface like above. Head to the img2img section. By the way, you can turn your rough drawing into pure art using the img2img feature. However, coming back to our topic, in the img2img tab, select the inpaint sub-section below the prompts field.
Prompt
Turn and write down your imagination in the detailed description under the prompt section. Try to add as many details as you can.
Negative Prompt
Add everything you don’t want Stable Diffusion to add in the output image. Here are 600+ Stable Diffusion negative prompts to assist you.
Upload Input Image
Upload your input image in the “Drop Image Here” section. You can either drag and drop the image or simply click the box and browse the image from your PC.
Start Painting the Mask
Once you have imported the image, start painting on the areas you want to alter. Use the hard black circular brush. Everything under this mask, or say, under this painting is what Stable Diffusion will alter. The rest will remain the same. So make sure you paint carefully. Here is what our final mask looks like.
Generate the Mask
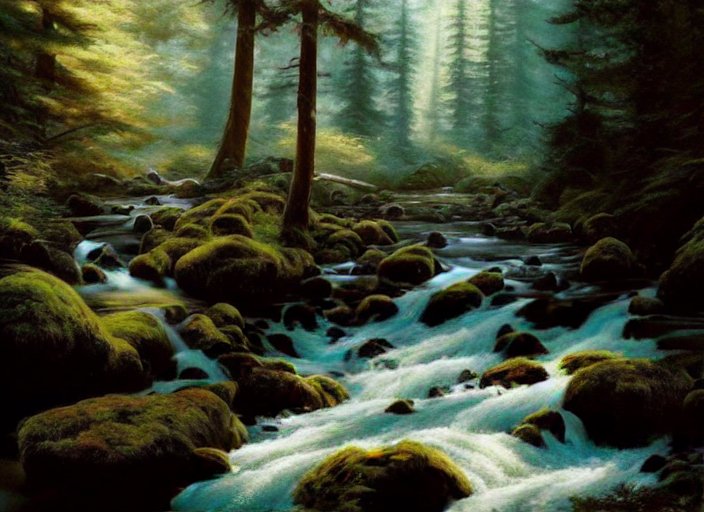
Once done, click on the “Generate” button. And you are done! Here is the result we got.

Let’s compare the both images side by side to get a good idea of what we actually did!