Are you tired of using Stable Diffusion on Discord? Do you want to push your creativity limits? Well, you are in the right place. In this blog, we will learn how to install Stable Diffusion on Windows 10 and 11. We will cover the topic in detail and will go through all the steps one by one. So without waiting any further, let’s get started.
System Requirements to Install Stable Diffusion on Windows 10
To run Stable Diffusion on your PC, your system needs to match the following requirements:
- Any good AMD or Intel CPU.
- A minimum of 16 GB of RAM.
- At least 256 GB SSD.
- At least 10 GB of free disk space.
- A GeForce RTX GPU with a minimum of 8 GB of GDDR6 memory.
What you will need?
Here is the list of things you will need to install Stable Diffusion on Windows 10.
Hugging Face Account
First of all, you will need an account on Hugging Face. You can create one for free by simply clicking here and entering the relevant information.
GitHub Account
The second thing you will need is an account on GitHub. You can create it for free too. Just click here and sign up by following the on-screen instructions.
Stable Diffusion Models
You will need to download the Stable Diffusion model from Hugging Face. For that, head to the Hugging Face, and in the search bar, type “stable diffusion”. You will see different models.
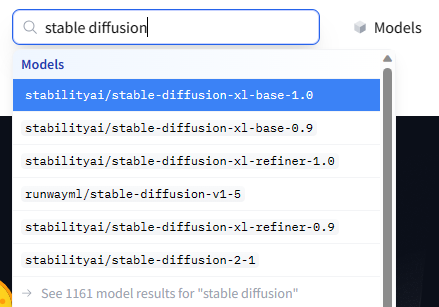

Each of them is a bit different from each other. You can discover details about each model on the Internet. However, for this tutorial, I installed the Stable Diffusion v1.4 Original model.
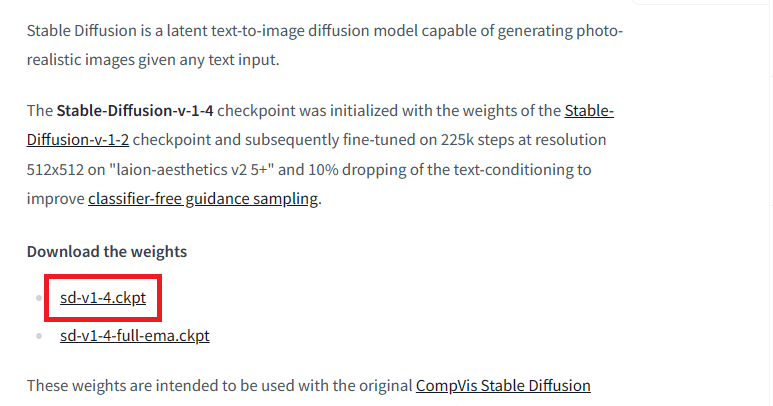
You can search for the same model on hugging face, or simply click here. Under “Download the weights” click on “sd-v14.ckpt” and it should start downloading the model.

Git for Windows
The next thing you will need is a software called Git for Windows. If you are familiar with Linux OS, you must have heard the command “git clone”. That is exactly what this software is going to do for us in Windows.
To download the software, simply click here. Click on the Download button and the software should start downloading.
Once the software is downloaded, double-click on the setup to install it and complete the installation process by following the on-screen instructions.
Python
The next thing you will need to install Stable Diffusion in Windows 10 is Python programming language. For that, click here and scroll down until you see “Files”. Click on “Windows Installer | Windows | Recommended” as shown below.
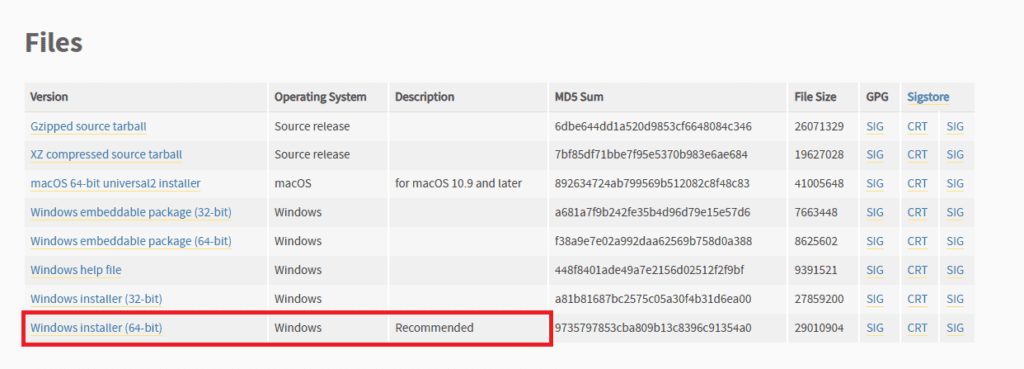

It will start downloading Python for you.
Once the downloading is completed, double-click on the Python setup file and install it by following the on-screen instructions.
That was all we needed to install Stable Diffusion on Windows 10.
Now let’s begin installing Stable Diffusion.
Location to Install Stable Diffusion on Windows 10
First of all you need to define the location where you want to install the Stable Diffusion. Remember, you will need at least 10 GB of free space to install the software. It is highly recommended to install it in an SSD for better performance.
Once you have decided where to install Stable Diffusion, simply create a new folder in that location. You can name it whatever you want. For this tutorial, we will name it “AI – Stable Diffusion”. Now copy this folder
Changing Directory
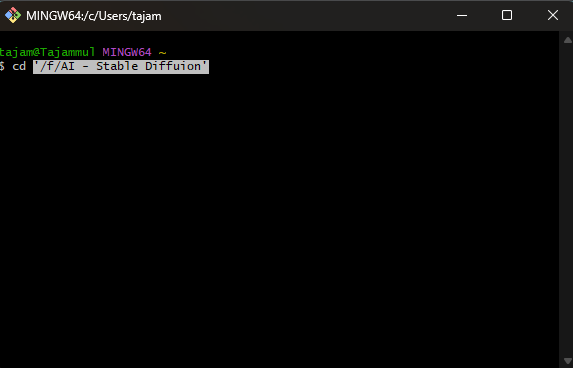
Now open Git for Windows and type cd[paste]. Replace Paste with the directory of the “AI – Stable Diffusion” folder by right-clicking and selecting “Paste”. It will change Git for Windows directory to the folder where we want to install Stable Diffusion in Windows 10.

Cloning Stable Diffusion in Windows 10
Now, you will need to clone Stable Diffusion 1111 in your Windows. For that, visit this link and click on “Code”. You should see the “Copy” button next to the code. Simply click this button, or just copy the code directly from here https://github.com/AUTOMATIC1111/stable-diffusion-webui.git.
Now go back to Git for Windows and issue this command “git clone [code]”. Replace [code] with the code you just copied.
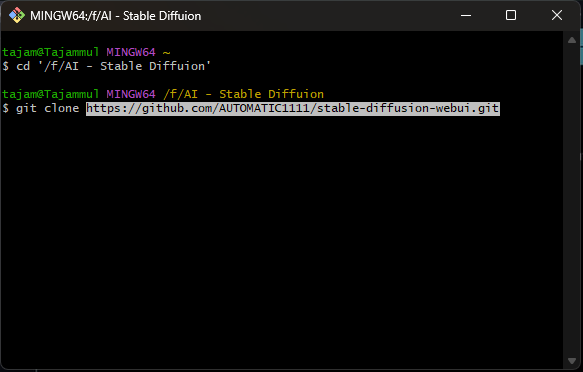

Hit Enter. It will take a minute or so. Wait for it to be completed.
Putting in Checkpoints
Now copy the sd-v14.ckpt you downloaded earlier and head to the “AI – Stable Diffusion” folder. Navigate to the path “Location\AI - Stable Diffuion\stable-diffusion-webui\models\Stable-diffusion”.
In this folder, you will see a text file saying “Put Stable Diffusion checkpoints here”. Paste the file you copied earlier.
Downloading Torch
Navigate to the path “Location\AI - Stable Diffuion\stable-diffusion-webui” and scroll to the end until you see this file called “webui-user.bat”.
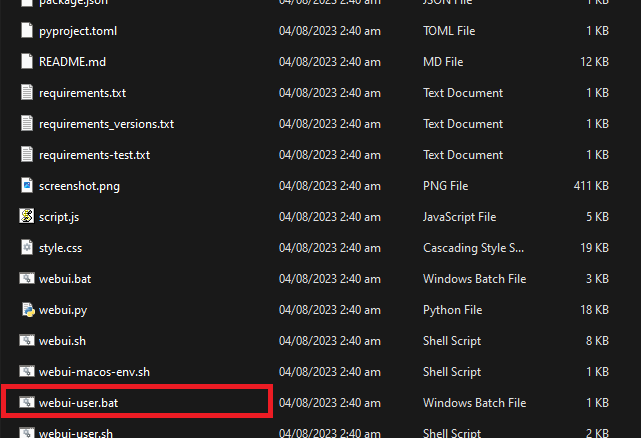

Double-click this file and it should initiate the download. Wait for it to be completed.
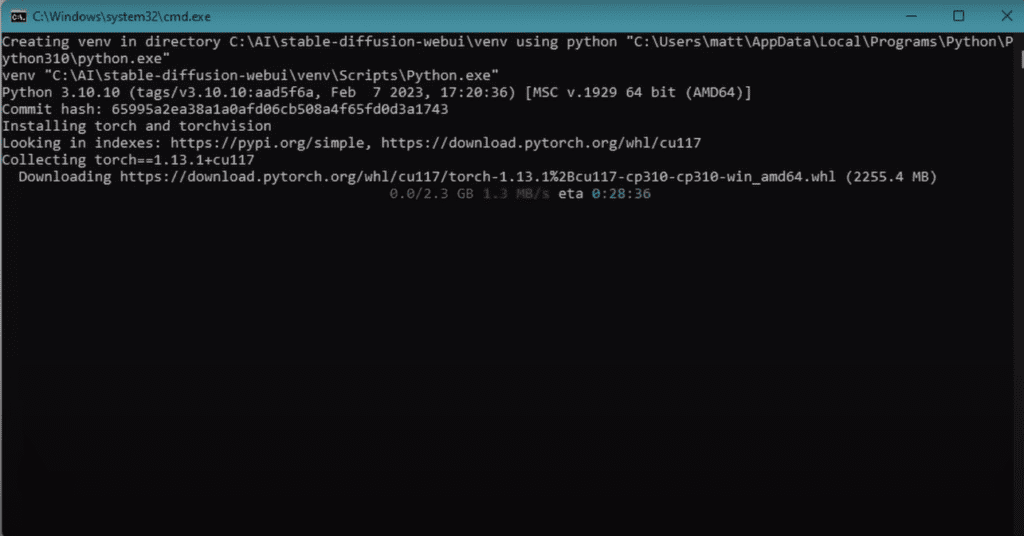

Here You Go!
Once that’s completed, you should see “Running on Local Machine” and a web address next to it.
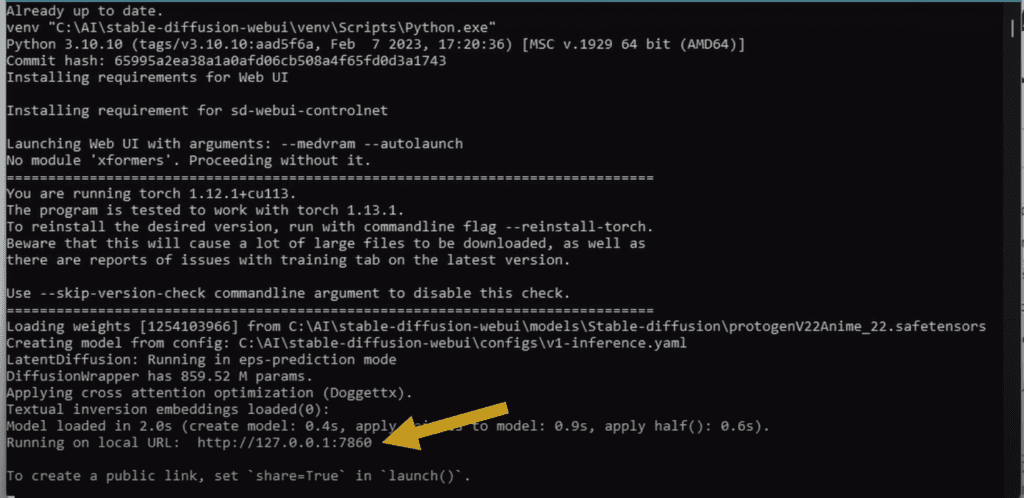

Simply copy the address and paste it into a new tab in your browser.
Bingo! You are inside the Stable Diffusion Web UI.
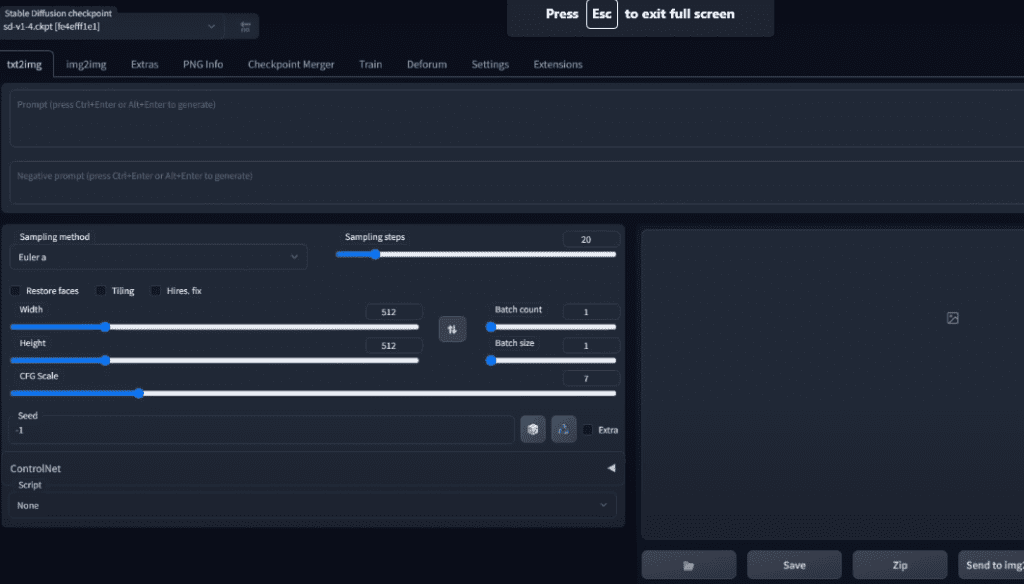

You can generate anything that you imagine without any restrictions! There are a lot of settings that you can play around to find the best for you.
If you are looking for amazing prompts to get started with, here they are. Additionally, if you run into any error while running Stable Diffusion on your PC, you can find a solution here. If you encounter a “Cuda out of Memory Error”, here are 7 ways to resolve that error.


