Taj S.

stable diffusion cuda out of memory

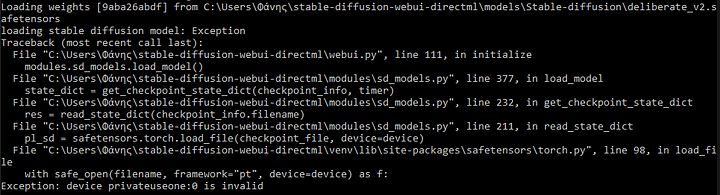
Here are 7 Ways to Fix Stable Diffusion Cuda Out of Memory Error

Using Stable Diffusion on your PC is highly productive and a enjoyable. However, some people may encountered the “Stable Diffusion Cuda out of Memory Error”. This error can be really frustrating as it can interrupt one’s artistic productivity. If you are one of those people, worry not. I will be sharing 7 effective ways to fix this error and keep going on with your creativity. So without waiting any further, let’s begin.


Stable Diffusion Cuda out of Memory – Restart Your PC

stable diffusion cuda out of memory

If previously, you didn’t have any problem running Stable Diffusion, there are chances that a simple system restart will fix this error. Sometimes the connection between Stable Diffusion and GPU may have been lost, and restarting fixed the issue according to many users. reported, a simple restart fixed [] this issue for them.


Lower Resolution Images

Many users were able to fix Stable Diffusion Cuda out of Memory error by generating low-resolution images. If your machine has low VRAM try generating low-resolution images like 512×512 or 256×256. For machines with less than 4GB VRAM, even lower resolutions may work fine. It’s worth noting that this may affect the image quality.


Reduce Sample Size to One

By default, Stable Diffusion provides you with multiple image results for a single prompt. However, if you are facing Stable Diffusion Cuda out of Memory error, you can try generating a single sample.  You can do that by simply adding “–n_samples 1” in your prompt. This method was useful for many users.


Install Anaconda alongside NVidia Cuda Toolkit

Installing and running Anaconda is another workaround that was suggested by many users to fix the Stable Diffusion Cuda out of Memory error. For those unfamiliar with Anaconda, it is an open-source environment management system used for installing and running packages for Python. Download the NVidia Cuda toolkit and follow the instructions on the relative GitHub repository to ensure Stable Diffusion works seamlessly.


Checking Your GPU Memory.

For the best result from Stable Diffusion, it is highly recommended to use a system with VRAM of at least 6GB. However, you can also go with 4GB of memory. But going below 4GB will lead to cuda out-of-memory error. So it is highly recommended to use Stable Diffusion on a system with at least 6GB of VRAM.


Edit the webui-user.bat File with Optimized Commands

webui-user.bat is the file that is used to run all the commands on Stable Diffusion. You can edit this file to use optimized commands which will allow Stable Diffusion to work more efficiently. Follow this simple guide to do so

  • Open the location where you have installed Stable Diffusion.
  • In the location, you should see this file called “webus-user.bat”.
  • Simply right-click on this file and click Edit.
  • Here you can add different arguments and find out which one works for you.
  • You can find all these arguments here.


Use an Optimized Version of Stable Diffusion

If you are still encountering the “Stable Diffusion Cuda out of Memory” error, consider using an optimized version of Stable Diffusion. In case you are using the original Stable Diffusion on your machine, you can simply download the optimized version and paste the contents in the “stable-diffusion-main” folder. You can refer to the detailed tutorial for further details.

stable diffusion cuda out of memory


Conclusion

Stable Diffusion is the only Image-to-Text AI model which can be installed on your PC. However, it comes with a lot of errors as every system has different hardware properties. Stable Diffusion Cuda out of Memory is one of the frustrating errors. However, there are many workarounds to fix this error. You can try restarting your system, generating low-resolution images, generating only one sample, and many more. Explore the full article to find out which solution works best for you.

Here is the Solution to these 5 Frustrating Stable Diffusion Errors

Text to Image AI technology is pretty popular these days. Some known players of this game are MidJourney, DallE, and Stable Diffusion. Unlike DallE and MidJourney, you can install and run Stable Diffusion on your own machine, given it matches the system requirements for the AI model. However, it’s common for users to face Stable Diffusion errors while running it on their machines.

Well, if you are one of the users facing these errors, you are at the right place! In this article, we will explore some common Stable Diffusion errors which can stop you from generating some amazing art. We will also see how you can fix these Stable Diffusion errors so you can keep using the AI model without any further barrier. So without waiting any further, let’s dive in!

Fixing Stable Diffusion Errors

For any of the Stable Diffusion errors demonstrated below, you will have to browse to the location where you have installed the Stable Diffusion Web-UI. Once you are at the right location, look for “webui-user.bat”. Right-click on the file and click “edit”. Next, add the respective arguments to “set COMMANDLINE_ARGS=” as demonstrated below:

stable diffusion error

You can find all command line arguments and settings here.


Black Image Error

Black Image is one of the major Stable Diffusion errors which can be annoying at times. However, here is an effective fix for that as well.

Using --disable-nan-check can cause this error, however, persisting the command may result in a normal image.

For NVIDIA GPU, use --xformers to solve black image generation. It is worth noting, you will have to install “xformers”. For that, simply open the terminal by pressing shift + right click and clicking “Open PowerShell window here”. In the terminal, type pip install xformers.

Another way to solve this error is by adding --no-half to the command-line arguments. Usually, this argument can be used with--precision-full or  --precision-autocast. Both --no-half and --precision-full combined, force stable diffusion process in 32-bit floating-point numbers (fp32) instead of cut-off 16-bit floating-point numbers (fp16).

If you wish the opposite processing, you can use --precision-autocast which will then use fp16 wherever possible. Using full precision can possibly give you better results. But as a tradeoff, it will take a bit longer. Stable Diffusion by default uses fp16 wherever possible, to speed up the process, despite the fact that there is less possible variation in outcomes.


Unable to Load “safetensors”

If you are unable to load “safetensors” models,  here is the fix. Simply add the following command in “webui-user.bat”:set SAFETENSORS_FAST_GPU=1

It’s worth noting that you will not be able to use safetensors while using --lowramoption argument. On doing so, you will get the following error:

stable diffusion errors


Not Enough Memory

stable diffusion errors

Another Stable Diffusion error is “Not Enough Memory”, which occurs when you are running Stable Diffusion on a machine with low VRAM. If your machine has 4 to 6GB of VRAM, adding –lowvram to the command-line arguments will surely fasten the process. If you are running Stable Diffusion on a machine with 8GB of VRAM, add –medvram instead.

Using these commands will prevent the “Not Enough Memory” error from occurring. Your machine’s memory will be conserved at the cost of a slower generation. If the error still persists even after adding the above commands, this means you will have to remove a few of the other options that you added before. You can also add --no-half, if you haven’t already.


NansException

stable diffusion errors

On getting the above error, you have to use --disable-nan-check with the other command-line arguments, as mentioned. There are chances that you might encounter this error if you use --opt-sub-quad-attention.


Bonus Tips for Better Performance

For running Stable Diffusion on an NVIDIA GPU, it is recommended to install –xformers. We have already discussed how you can do that. xformers will boost Stable Diffusion performance on your machine.

Starting without any of the above-shared arguments can result in faster processing of the images. However, when you encounter any error, you can progressively add the arguments as per the requirements. In my case, along with –xformers, I started with –medvram only, as I have 8GB of VRAM. Later, I added--opt-sub-quad-attention for better performance.

--opt-split-attention or --opt-split-attention-v1 can also be used along with --opt-sub-quad-attention or separately. --opt-sub-quad-attention is considered better than --opt-split-attention for AMD GPUs. However, NaNsException happened to occur on using this, so I added --disable-nan-check.

But after adding that, stable diffusion started to generate black images. To fix that, I had to add --no-half and --precision-autocast.

After using the above shared arguments, never had an error as of writing this article.


Conclusion

Text-to-image AI technology is pretty popular these days. As Stable Diffusion is open source, it is a bit different than other AI models of its type like MidJourney, and DallE. However, installing Stable Diffusion on your own machine comes with some errors which can be frustrating at times. This blog provides you with a list of Stable Diffusion errors with their solution which can keep you going.

stable diffusion best negative prompt

Here are 600+ Negative Prompts for Stable Diffusion to Enhance Your Creativity

Stable Diffusion is a popular text-to-image AI model which can convert your imaginative words into realistic graphics. These imaginative words you issue to AI model are called prompts. In this article, we will discover how you can improve your Stable Diffusion image creation using negative prompts. We will discuss what the stable diffusion negative prompts meaning is, how to use them, what few stable diffusion best negative prompts are, and more. I will also share stable diffusion negative prompt list to help you use them immediately. So let’s get started!


Stable Diffusion Negative Prompt Meaning

A negative prompt is a prompt that specifies to the AI model what things it should not include in the result of the main prompt. For example, if you issue stable diffusion a prompt for generating an image with a sports car and you don’t want the sports car to be white color, you can simply add a negative prompt saying “white color”. The AI model will not include red color in the result.

Similarly, there are hundreds of stable diffusion best negative prompts that can help you reach the closest possible result to your imagination. Ahead in this article, I have shared a full stable diffusion negative prompt list which you can use in your negative prompts to get the best possible results.


Stable Diffusion Best Negative Prompt – How it Works?

I asked Stable Diffusion to generate a Sports car on a highway. Here is what it generated.

stable diffusion best negative prompt

Prompt: “sports car at highway”.

Next, I issued the same command but this time, I added a negative prompt “white color”. The result this time was a bit different, but there was no white color in the result.

stable diffusion best negative prompt

This is how negative prompts for stable diffusion works.


How to use Stable Diffusion Best Negative Prompts

Using stable diffusion best negative prompts is really easy and straightforward. When issuing a prompt to Stable Diffusion in the textbox, simply click on +3 more and you should see a negative prompt section as shown below.

stable diffusion best negative prompt

Put in the negative prompt according to your main prompt and hit enter. Your results will surely be better than usual!


Best Stable Diffusion Negative Prompts

Here comes the Best Stable Diffusion Negative Prompts for all categories.


Universal Stable Diffusion Negative Prompt List

  • amputee
  • autograph
  • bad anatomy
  • bad illustration
  • bad proportions
  • beyond the borders
  • blank background
  • blurry
  • body out of frame
  • boring background
  • branding
  • cropped
  • cut off
  • deformed
  • disfigured
  • dismembered
  • disproportioned
  • distorted
  • draft
  • duplicate
  • duplicated features
  • extra arms
  • extra fingers
  • extra hands
  • extra legs
  • extra limbs
  • fault
  • flaw
  • fused fingers
  • grains
  • grainy
  • gross proportions
  • hazy
  • identifying mark
  • improper scale
  • incorrect physiology
  • incorrect ratio
  • indistinct
  • kitsch
  • logo
  • long neck
  • low quality
  • low resolution
  • macabre
  • malformed
  • mark
  • misshapen
  • missing arms
  • missing fingers
  • missing hands
  • missing legs
  • mistake
  • morbid
  • mutated hands
  • mutation
  • mutilated
  • off-screen
  • out of frame
  • out of frame
  • outside the picture
  • pixelated
  • poorly drawn face
  • poorly drawn feet
  • poorly drawn hands
  • printed words
  • render
  • repellent
  • replicate
  • reproduce
  • revolting dimensions
  • script
  • shortened
  • sign
  • signature
  • split image
  • squint
  • storyboard
  • text
  • tiling
  • trimmed
  • ugly
  • unfocused
  • unattractive
  • unnatural pose
  • unreal engine
  • unsightly
  • watermark
  • written language


Stable Diffusion Best Negative Prompts for Landscapes

  • blurry
  • boring
  • close-up
  • dark (optional)
  • details are low
  • distorted details
  • eerie
  • foggy (optional)
  • gloomy (optional)
  • grains
  • grainy
  • grayscale (optional)
  • homogenous
  • low contrast
  • low quality
  • lowres
  • macro
  • monochrome (optional)
  • multiple angles
  • multiple views
  • opaque
  • overexposed
  • oversaturated
  • plain
  • plain background
  • portrait
  • simple background
  • standard
  • surreal
  • unattractive
  • uncreative
  • underexposed


Stable Diffusion Best Negative Prompts for Cityscapes and Street Views

  • animals (optional)
  • asymmetrical buildings
  • blurry
  • cars (optional)
  • close-up
  • creepy
  • deformed structures
  • grainy
  • jpeg artifacts
  • low contrast
  • low quality
  • macro
  • multiple angles
  • multiple views
  • overexposed
  • oversaturated
  • people (optional)
  • pets (optional)
  • plain background
  • scary
  • solid background
  • surreal
  • underexposed
  • unreal architecture
  • unreal sky
  • weird colors


Stable Diffusion Best Negative Prompts for Portrait Shots of People and Pets

  • 3D
  • absent limbs
  • age spot
  • additional appendages
  • additional digits
  • additional limbs
  • altered appendages
  • amputee
  • asymmetric
  • asymmetric ears
  • bad anatomy
  • bad ears
  • bad eyes
  • bad face
  • bad proportions
  • beard (optional)
  • broken finger
  • broken hand
  • broken leg
  • broken wrist
  • cartoon
  • childish (optional)
  • cloned face
  • cloned head
  • collapsed eyeshadow
  • combined appendages
  • conjoined
  • copied visage
  • corpse
  • cripple
  • cropped head
  • cross-eyed
  • depressed
  • desiccated
  • disconnected limb
  • disfigured
  • dismembered
  • disproportionate
  • double face
  • duplicated features
  • eerie
  • elongated throat
  • excess appendages
  • excess body parts
  • excess extremities
  • extended cervical region
  • extra limb
  • fat
  • flawed structure
  • floating hair (optional)
  • floating limb
  • four fingers per hand
  • fused hand
  • group of people
  • gruesome
  • high depth of field
  • immature
  • imperfect eyes
  • incorrect physiology
  • kitsch
  • lacking appendages
  • lacking body
  • long body
  • macabre
  • malformed hands
  • malformed limbs
  • mangled
  • mangled visage
  • merged phalanges
  • missing arm
  • missing leg
  • missing limb
  • mustache (optional)
  • nonexistent extremities
  • old
  • out of focus
  • out of frame
  • parched
  • plastic
  • poor facial details
  • poor morphology
  • poorly drawn face
  • poorly drawn feet
  • poorly drawn hands
  • poorly rendered face
  • poorly rendered hands
  • six fingers per hand
  • skewed eyes
  • skin blemishes
  • squint
  • stiff face
  • stretched nape
  • stuffed animal
  • surplus appendages
  • surplus phalanges
  • surreal
  • ugly
  • unbalanced body
  • unnatural
  • unnatural body
  • unnatural skin
  • unnatural skin tone
  • weird colors


Stable Diffusion Best Negative Prompts for Photorealistic Photos

  • 3D render
  • aberrations
  • abstract
  • anime
  • black and white (optional)
  • cartoon
  • collapsed
  • conjoined
  • creative
  • drawing
  • extra windows
  • harsh lighting
  • illustration
  • jpeg artifacts
  • low saturation
  • monochrome (optional)
  • multiple levels
  • overexposed
  • oversaturated
  • painting
  • photoshop
  • rotten
  • sketches
  • surreal
  • twisted
  • UI
  • underexposed
  • unnatural
  • unreal engine
  • unrealistic
  • video game


Stable Diffusion Best Negative Prompts for Paintings, Drawings, and Illustrations

  • 3D
  • bad art
  • bad artist
  • bad fan art
  • CGI
  • grainy
  • human (optional)
  • inaccurate sky
  • inaccurate trees
  • kitsch
  • lazy art
  • less creative
  • lowres
  • noise
  • photorealistic
  • poor detailing
  • realism
  • realistic
  • render
  • stacked background
  • stock image
  • stock photo
  • text
  • unprofessional
  • unsmooth


You can use any of these prompts to gain the best results from your input. Hope you liked the blog. Make sure to check out 10 Best Stable Diffusion Prompts to Boost Your Creativity.


anime stable diffusion prompts, stable diffusion anime prompts

Here are 10 Anime Stable Diffusion Prompts to Satisfy Your Love for Anime

The text-to-image technology has been in place for a while now. As an anime fan, you might be curious to use it to satisfy your love for anime. Well, you are in the right place! In this blog, we will be using Stable Diffusion for the demonstration. I have shared the list of anime stable diffusion prompts the results for which will surely leave you in wonder. Using these anime Stable Diffusion prompts, you will be able to generate anime graphics satisfying your imagination. But before we get started, let’s just take a look at what Stable Diffusion is.


Introducing Stable Diffusion

Stable diffusion is an advanced text-to-image AI model which was launched in 2022. The AI model is capable of converting your imaginative words into realistic graphics. It differs a bit from other text-to-image AI models like Midjourney and Dall E. If you want to discover the differences, you can read our previous blog.

It is important to note that for this blog we will be using anime Stable Diffusion prompts. However, you can try these prompts on other image AI models as well. Before we head to our Stable Diffusion anime prompts, let’s first see how you can get started with stable diffusion assuming you don’t have any prior knowledge.


Getting Started with Stable Diffusion

If you are already familiar with Stable Diffusion, feel free to skip to Anime Stable Diffusion Prompts paragraph.

Getting started with Stable Diffusion is really simple and easy. For this, you will just need a device, a Discord account, and an active internet connection. If you are unfamiliar with Discord, you can easily create an account.

Next, you have to follow these simple steps to start using Stable Diffusion.

  1. Join Stable Diffusion Discord Server.
  2. Click “Accept Invite”.
  3. You are now in the Stable Diffusion Discord server!
  4. In the text box simply express your imagination in words and Stable Diffusion will do its wonders.
  5. Stable Diffusion anime prompts are here to assist you!


Limitations of Stable Diffusion Anime Prompts

This blog shows the results of the Stable Diffusion on Discord. The results may not be as good as if were generated on a dedicated Stable Diffusion anime model. Stable Diffusion models are a method to take the Stable Diffusion capabilities to next level and bridge the production gap faced by online Discord-based Stable Diffusion. Using the Discord-based Stable Diffusion, you can take a good idea of how anime Stable Diffusion prompts will generate results when you are using it on Discord. However, for the best results, it is advised to use one of the Stable Diffusion anime models on your PC.

Additionally, these anime Stable Diffusion prompts will not generate the same result each time. However, you can get an idea of which keywords you can use for the best result.


Anime Stable Diffusion Prompts

Let’s not wait further, and discover Stable Diffusion anime prompts. I have tried various prompts, ranging from highly detailed to more generic, from Anime style to 3D models. Feel free to draw inspiration from these prompts.

An Anime Cyber Punk Boy

anime stable diffusion prompts, stable diffusion anime prompts

Prompt: “Man sitting at a table with a laptop and a computer, a digital conceptual art illustration by Ross Tran and Bayard Wu, cyberpunk anime digital art, cyberpunk illustration, cyberpunk art station aesthetics, cyberpunk art style, Makoto Shinkai (Legends of the Apex), detailed cyberpunk illustration, Digital Conceptual Art Illustration, detailed illustration of game art, detailed digital conceptual art”

Style: Anime


A Fairy Tale Anime Girl

anime stable diffusion prompts, stable diffusion anime prompts

Prompt: “An alluring anime girl from Fairy Tale, girl, anime, Ginger and blonde, background, long hair, knight, ultra quality, God armor, detailed armor, detailed face, and detailed eyes”


Boy in the Streets of Japan

anime stable diffusion prompts, stable diffusion anime prompts

Prompt: “Anime boy wearing glasses, riding on a bicycle and listening to music, roaming around in the street of rural Japan city, relaxed, pink and purple clouds, wide angle, anime boy, soft light”


A Super Hero

anime stable diffusion prompts, stable diffusion anime prompts

Prompt: “A light-skinned half-elf with short brown hair and slightly swept-back bangs. His dark brown penetrating eyes look ahead. He wears a dark red cloak, under which armor is slightly visible. Although the young man looks sickly, he stands firmly and confidently on the ground. In his hands, he holds a steel rapier.”

Style: Anime


Girl with Her Pets

anime stable diffusion prompts, stable diffusion anime prompts

Prompt: “Girl and her dogs walking on the street. Small Town. Flowers and butterflies around”


Victorian Anime Art

anime stable diffusion prompts, stable diffusion anime prompts

Prompt: “Victorian, detailed face, Danbooru, white gloves, zirba art style, final fantasy, fantasy, white hair, detailed illustration, illustration, 90s anime art, masterpiece”

For the following commands, I used “3D model” style.


Boy in the Library

anime stable diffusion prompts, stable diffusion anime prompts

Prompt: “Anime boy with large blue eyes and beautiful physique a reading a book in library, wearing glasses, wearing red shirt.”

Style: 3D model.

Beautiful Girl in the Caféanime stable diffusion prompts, stable diffusion anime prompts


Prompt: “Beautiful anime girl with red eyes, sitting on a cafe, smiling while looking at the camera, holding phone in her hand, having a cup of tea in cozy beautiful weather, beautiful aesthetics ambiance, Japanese style cafe, detailed graphics.”

Style: 3D model

Beautiful Couple on the Streets of Tokyo
anime stable diffusion prompts, stable diffusion anime prompts

Prompt: “Handsome anime boy with her shy girlfriend, both holding hands and walking on the streets of Tokyo, happy and satisfied”

Style: 3D model

Alone Boy at MidNight

anime stable diffusion prompts, stable diffusion anime prompts

Prompt: “An anime boy sitting on the terrace and looking at the Tokyo city full of lights and traffic, side view, mid night”

Style: 3D Model


Hope you enjoyed these anime Stable Diffusion Prompts. Make sure to check out the best stable diffusion commands that will boost your creativity.

best stable diffusion

Here are 10 Best Stable Diffusion Prompts to Boost Your Creativity

You might be curious to use text-to-image AI technology which has recently been pretty popular. Look no further! This comprehensive guide will help you get your hands on stable diffusion. Additionally, using the 10 best stable diffusion prompts I shared, you will be able to convert your imagination to the actual graphics. So without waiting any further, let’s get started.


What is Stable Diffusion?

Launched in 2022, stable diffusion is an advanced text-to-image AI model which converts your imagination into realistic graphics. Unlike Midjourney and Dall E, it works under an open-source license. If you are wondering how stable diffusion is different from other AI models, you can figure that out here.

Before we head to our best stable diffusion prompts, let’s first see how you can get started with stable diffusion without any prior knowledge.


How to Use Stable Diffusion?

Getting started with stable diffusion is really simple and easy. All you need is a device, an active internet connection, and a Discord account. If you don’t already have a Discord account, you can easily create one.

Now let’s walk through the simple steps to start using Stable Diffusion. If you are already familiar with the process, you can skip to the next paragraph for the best stable diffusion prompts.

  1. Login to your Discord account.
  2. Click here to join Stable Diffusion Discord Server.
  3. Click “Accept Invite”.
  4. You are in the Stable Diffusion Discord server.
  5. In the text box simply write down your imagination and Stable Diffusion will convert your words into captivating graphics.


10 Best Stable Diffusion Prompts

It is important to note that these prompts will not necessarily generate the same results each time. However, these can help you get the idea on how to use the AI model efficiently.

Now let’s explore the best stable diffusion prompts to boost your creativity and productivity.

Beautiful Turkish Girl

best stable diffusion prompts - Turkish Girl

 Prompt: “a beautiful Turkish girl side view, daylight, vibrant colors, photographic image, high quality portrait, detailed photograph”


Beautiful Girl with More Details

As you keep adding more details to your prompt, the results will keep on getting better. Here is another command for a beautiful girl but this time with more details

best stable diffusion prompts

Prompt: “Beautiful pakistani girl, wearing high-quality modern dress, on a balcony with a beautiful nightscape background, beautiful smile on her face, short black hair, tall height, looking into the camera, very fair skin tone, photo captured with  Canon EOS R5 camera with an 85mm f/1.4 prime lens”

As I added to the prompt that the image should be captured with Canon EOS R5 Camera, the image quality significantly enhanced. You can test this with different camera models and lenses.


Neon Punk City Wallpaper

If you are looking to generate a wallpaper for your mobile or desktop, here are few best stable diffusion prompts for that. For this neon punk city with beautiful lighting, I chose the “Neon Punk” style under the style section. Additionally, the aspect ratio for this command was 16:9. Here is the result!

stable diffusion best prompts

Prompt : “Beautiful city after rain, water over the roads, street lights fading away, street view, highly realistic and aesthatic view, beautiful landscape, wallpaper, high definition image, high quality”


Yellow Street Light City Wallpaper

Here are some more beautiful wallpapers with realistic vibe. The style for both was “Photography”, and aspect ratio was 16:9.

best stable diffusion prompts

Prompt: “Beautiful city after rain, water over the roads, yellow street lights fading away, street view at midnight, highly realistic and aesthatic view, beautiful landscape, wallpaper, high defiintion image, high quality”

Here is the second wallpaper

best stable diffusion prompts

Prompt: “Old beautiful city after rain, yellow street lights fading away, rain water over the roads, beautiful top street view, aesthatic vibes, midnigh vibes, empty roads and yellow street lights, high quality high definition image, highly realistic aesthatic and viby”


Playing with Alphabets – ASCII Art Car

ASCII Art Car

Prompt: “A car made out of ASCII art (text), driving on a highway, scenic, mountainous, midday. beautiful volumetric cinematic lighting, masterpiece, best quality, award-winning, coherent, exquisite cinematography, film still, RAW, shot on 35mm. bokeh, insanely detailed. 16K, HDR, detailed photorealistic textures, filmic”.


Sid Vicious & John Jett 3D Model

Sid vicious and Joan jett

Prompt: “an androgynous woman with a mixed appearance between Sid vicious and Joan Jett, digital art, beautiful, wearing a high standard classic gothic black dress, anime style, one person”


Warning: Horror Content Ahead.


Evil Witch Painting

I wanted to push Stable Diffusion’s creative capabilities to the next level. So are some best stable diffusion prompts for generating some beautiful images based on horror scenarios.

horror themed panting

Prompt: Horror-themed painting of a young and evil witch with long red robe holding severed head of her victim with a delightful smile on her face, indoors, dungeon,  blood is leaking from the eye sockets of severed head, symbolism, occult”

Here is another example.

beautiful horror girl

Prompt: “Beautiful horror girl, with smile on her face, wearing blood red dress, having a served head in her hands, blood all around her, hdr, high quality, oil painted, horror genre”


Beautiful Room with Black Walls

Room with Black Walls

Prompt: “Depict a room with black walls. On the black walls, draw space and constellations in a detailed, precise geometric style, using only black and white colors respectively. Scandinavian style.Use Canon EF 24-70mm f/2.8L II USM, 4K”


Hopefully, these best stable diffusion prompts will inspire your productivity. If you are interested in anime prompts, subscribe to our newsletter. I will be covering the best anime prompts for stable diffusion in the coming days. Make sure you don’t miss out.


threads vs twitter

Threads Vs Twitter – Unraveling 10 Important Differences

Meta recently launched Threads, a Twitter rivalry app. Despite sharing a lot of similarities, both apps can be distinguished for some features. Today, we will explore Threads vs Twitter to find out the similarities and differences between both apps.


Threads Vs Twitter – People You Follow

For new Twitter users, it can be really frustrating to establish entirely new social connections.

Threads, however, let you follow your existing connections from Instagram.


Threads Vs Twitter – Profile Customization

You have complete control over customizing your profile including username, bio and profile picture on Twitter.

On the other hand, Threads does not offer much profile customization. You have to use your Instagram account username on Threads. To change your username on threads, you will have to change your Instagram username. However you can change your profile picture on Threads.


Threads Vs Twitter – Subscription Models

After Elon Musk’s takeover, Twitter introduced a subscription model called “Twitter Blue” subscription. Paying $8 per month, subscribers enjoy additional benefits.

Instagram Threads don’t offer any subscription model as of writing this article.


Threads Vs Twitter – Character Limit

Regular Twitter users can post a Tweet with a maximum character limit of 280. Twitter Blue subscribers, however, have an extended limit of 2500 characters.

Threads allow its users to post a Thread with a maximum of 500 characters.

Additionally, Twitter users can post a video with a maximum length of 2 minutes and 20 seconds.

On the other hand, Threads allows its users to post a video with a maximum length of 5 minutes.


Threads Vs Twitter – Usage Limit

Twitter recently imposed restrictions on regular Twitter users, limiting them to viewing maximum 600 Tweets per day. However, verified accounts can read up to 6000 Tweets per day.

Instagram Threads, on the other hand, do not have any usage limit like this.


Twitter Vs Threads – Verification

You can pay $8 per month to get a blue verification tick on Twitter.

In contrast, to be verified on Threads, you need to have a verified status on Instagram. The status will be carried out to your Threads account as well.


Twitter Vs Threads – Desktop Access

Twitter is easily accessible and useable on Desktop.

However, for Threads, you can only view posts on Desktop. Posting anything from Desktop is not possible.

Twitter Vs Threads – Search

On Twitter, you can search for people, accounts, and Tweet content.

However, only account search is possible on Threads. It may be inconvenient for people to discover they can’t search for the posted content.


Twitter Vs Threads – Direct Messages

Twitter provides you with the Direct Message feature using which you can connect people more effectively.

However, Threads don’t offer a Direct Message feature as of now. You have to message the person on Instagram to get connected with them.


Twitter Vs Threads – Data Collection

Although both apps collect data to provide the best user experience, here is the detail of the data that is collected for both apps on iPhone.

threads vs twitter - twitter data collection
Twitter
Threads vs Twitter
Threads


Twitter Vs Threads – Deleting Account

If you wish to delete your account permanently, it’s pretty straightforward on Twitter. You need to go to Settings and Privacy > Your Account > Deactivate your Account. Your account and all the associated data will be deleted permanently in next 30 days.


However when it comes to Threads, its not that simple. You will need to delete your Instagram account to delete your Threads account. Yes you read it right! There is no way to delete your Threads account permanently without deleting your Instagram account permanently.


Conclusion

In conclusion, Meta just launched a Twitter rivalry app, Threads. Both Twitter and Threads share a lot of similarities and differences. On Twitter, you need to build entirely new connections, however, Threads let you follow the existing Instagram connections. You can totally customize your profile on Twitter, but when it comes to Threads, you cannot customize your profile by default. You have to follow your Instagram profile to make changes to your Threads accounts.

Twitter offers a subscription model, Twitter Blue with extra benefits. While threads don’t offer any subscription model. Further differences like character limits, video length, usage restrictions, desktop access, search capabilities, direct messaging, verification processes, and account deletion set these platforms apart from each other. Despite their shared purpose, Twitter and Threads both offer different user experiences.

Hope you enjoyed the article. Don’t forget to check out the stories we covered about WhatsApp, ChatGPT, Stable Diffusion, and more!

midjourney vs stable diffusion

Midjourney Vs Stable Diffusion – 10 Differences to Make You Choose One

Midjourney and Stable Diffusion prominently emerged into the landscape of Artificial Intelligence Image Generation in mid-2022. Both aimed to simplify the process of image generation from natural language. In this article, we will discuss Midjourney vs Stable Diffusion. How both are different and which one could be a better choice for you. I will also share a step-by-step guide for getting started on both of them. So without waiting anymore, let’s get started.


Midjourney Vs Stable Difusion Key Differences and Comparison

Here are the key differences comparing both image-generative AI models.


Midjourney Vs Stable Diffusion: License Model

Midjourney works as a business-for-profit organization. It was launched by a private team of 11 people back in 2022. It uses a proprietary machine-learning model.

On the other hand, Stable Diffusion was launched by a startup company, Stability AI. So it does not operate as a private business or profit organization. Moreover, it works under an open-source license.


Midjourney Vs Stable Diffusion: Medium of Usage

To use Midjourney, you need to have a Discord account. It is the only way to access this AI image generative model.

Contrarily, Stable Diffusion, can either be accessed through their Discord server or can be installed and used on your own machine if it meets the system requirements. It can also be used in many online and offline apps.


Midjourney Vs Stable Diffusion: Pricing Models

As it works for profit, Midjourney offers a paid model. You need to pay some bucks to generate images from this AI image model. It is worth noting that even with the paid Midjourney subscriptions, you get a limited amount of image generations. High-tire plans may offer unlimited generations under relaxed hours.

However, you can use Stable Diffusion totally free of cost. Whether you are using it in its discord server, or on your own machine, you can generate unlimited images. But using Stable Diffusion for free may require some effort.


Midjourney Vs Stable Diffusion: Custom Models

Midjourney offers a limited number of custom models which you can use online.

On the other hand, Stable Diffusion comes with 1000+ online models which you can download and run on your PC, totally free of cost.


Midjourney Vs Stable Diffusion: Ease of Use

Midjourney may seem to be easier to use for its small number of customization buttons.

Nevertheless, Stable Diffusion offers advanced features and customizations, once you have mastered its usage.


Midjourney Vs Stable Diffusion: Art Models

Midjourney offers anime based art model which can be used using the ” –niji ” parameter.

However, Stable Diffusion offers tens of different art models in its online variant. Moreover, its downloadable custom models are trained with different styles which can be utilized to generate different art model images.


Midjourney Vs Stable Diffusion: Image Prompts

In Midjourney, you can use images as a part of your prompt. The image generative model will consider both your text and image prompt to generate the desired results.

Stable Diffusion, however, only accepts text-based commands at of writing of this article.


Midjourney Vs Stable Diffusion: Censorships

Midjourney strictly prohibits the generation of explicit content. Your account can be banned without warning if your prompts contain explicit content or aggressive language.

Stable Diffusion follows similar guidelines in their online servers. However, you may have some flexibility in working around these limitations when using custom models.


Midjourney Vs Stable Diffusion: Image Quality

Now let’s look at some real-world examples by comparing the images generated with the same command, to help you choose between the two models.

For the following example, the prompt was “a large white serpentine dragon perched atop a rock watching the horizon”. You can already see the quality difference between both of the image generative model’s results.

Picture Credit: Android Authority


In our second example, realism clearly popped up in the results of Midjourney. If you are looking for more realistic images, Midjourney is your way!


Picture Credit: Android Authority


Midjourney Vs Stable Diffusion: How to Start?

If you have chosen between the two models, here is how to start using your desired one.

For both AI image models, you need to have a Discord account. If you don’t already have a Discord account, click here to create one.

Getting Started with Midjourney

  1. Join their discord server by clicking here.
  2. Click Accept Invite.
  3. To subscribe to a Midjourney plan, go to the “newbies” channel
  4. Type “/subscribe” in the text box and hit enter.
  5. Choose your desired pricing plan and click subscribe.
  6. Start generating your first image by entering “/imagine [your prompt here]


Getting Started with Stable Diffusion

  1. Join the Discord server by clicking here.
  2. Click Accept Invite
  3. Navigate to any of the “bot” channels.
  4. Start generating your first image by entering “/dream[your prompt here]

Conclusion

Midjourney and Stable Diffusion are two prominent players in the game of AI image generation. Yet both have different characteristics. Midjourney works as a business for-profit organization, while Stable Diffusion works as an open-source model. Midjourney can only be accessed online while Stable Diffusion can be accessed online or on your own machine. Midjourney offers paid plans for utilizing its image generation capabilities, while Stable Diffusion is totally free of cost. Both AI image generative models produce totally different image quality and concepts. Consider all the differences before choosing one.

Hope you enjoyed this Midjourney Vs Stable Diffusion comparison. Don’t forget to check out the other AI stories we covered.

Generate these Beautiful QR Code Arts in Few Simple Steps

If you’re here, I assume you want to generate a QR code just like the one you saw above. Am I right? Well, you’ve come to the right place. In this article, we will explore how you can create QR code art without stable diffusion for yourself or your business.

QR code arts are typically best generated using Stable Diffusion. But you don’t need to worry if you don’t have a powerful machine or you can’t use Stable Diffusion ControlNet. In the future, I’ll also cover how to generate these QR code arts with Stable Diffusion. But for today, let’s focus on learning how you can generate these beautiful and scannable QR code arts without Stable Diffusion. All you need for this tutorial is an active internet connection and a lot of excitement. So let’s get started!


Why QR Code Art?

It’s pretty obvious. The classic black and white QR codes are dull and outdated, while these new QR code arts are visually interesting. When someone will come across your unique QR code for the first time, it will undoubtedly catch their attention. They’ll be curious to scan the code and discover what lies behind it. This will eventually increase the chances of them visiting your pages.


Limitations of QR Code Art

Before we proceed further, let’s consider a few limitations you will have to face using this method.


Quality of the QR Code Art

As mentioned earlier, today we will be generating QR code art without Stable Diffusion. So the quality may not be as high as what you would achieve with Stable Diffusion. However, it will still be good enough to attract attention.


Limited Trail

Since this method is free, it allows you to generate a limited number of QR code arts. Nevertheless, I assure you that these free trials will be more than sufficient to create something impressive for yourself or your business. In other words, you will get tons of free QR Code Arts with one account.


Inconsistency

Since we will use a relatively new AI model, you may witness inconsistency in its behavior. You might not find exactly what you’re looking for on your first attempt. However, you can play around with different experiments and explore different options to achieve your desired results.


Generating QR Code Art without Stable Diffusion

Now let’s see how you can actually create a beautiful QR code art without stable diffusion. You simply need to follow this step-by-step guide to bring your desired QR code design to life.


Before we proceed, here are the examples of what I generated using this method. You can scan these codes for your satsifcation.

QR Code Art without Stable Diffusion


Step 1: Generate a QR Code

  • Visit the Quick QR Art website. You can either search for it or click here to access it directly.
  • On the website, you’ll find several options for your QR code art, including Link, Text, Email, Location, Phone, SMS, WhatsApp, Skype, Zoom, Wifi, V-Card, Event, PayPal, and Bitcoin. Choose the option according to your needs.

QR Code Art Generating Website

  • For this tutorial, I will be selecting the “Link” option to create a QR for my website.
  • Similarly, you can enter the relevant information for your QR Code. The website will automatically generate one for you.
  • You can now customize the colors, design, logo, frame, and other options to personalize your QR code. Keep in mind that it’s still a simple QR code at this stage.

QR Code Art without Stable Diffusion

  • Once you get your desired output, click the “Save” button below the QR code.
  • Under the save button, you’ll see tiny buttons indicating save as PNG, SVG, and PDF. Choose the first tiny button to save the QR code as a PNG file on your computer.

QR Code Art without Stable Diffusion


Step 2: Join the Discord Server

  • To proceed with this step, you’ll need a Discord account. If you don’t have one already, you can sign up here.
  • Scroll to the top of the Quick QR Art website and look for the “Join Beta Now >>” button.

Quick QR Art without Stable Diffusion

  • Click on it, and it will take you to the Discord server.


Step 3: Create the QR Code Art

  • Inside the Discord server, you will see a “paste-bin” channel on the left side.
  • Go to this channel and at the beginning of the text box, you’ll see a “+” icon.
  • Click on the “+” icon and select “Add Media.”

Quick QR Art without Stable Diffusion

  • Browse your PC/mobile for the QR code you previously saved as a PNG file. Select the file and upload it into the Paste-bin channel.
  • Once the QR code is uploaded, right-click on it and choose “Copy Message Link.”

Quick QR Art without Stable Diffusion

  • Move to any of these channels called “pixelml-bot” and start typing your command.
  • Start with typing “/generate” and press the space bar.
  • The command will ask you to choose a preset you would like to use for your QR Code Art. Select the one to your satisfaction. Here is a handy preset guide to assist you in choosing one. I chose “ultra-realism” for this tutorial.
  • Next, you need to enter a prompt. Simply think of what you want for your QR Code Art and describe it in words. Here is a demonstration:

Quick QR Art without Stable Diffusion

  • In the URL section, paste the message link copied earlier within the Discord server.
  • Now press enter, sit back, and let the AI do its magic.


Parameters:

You can use these parameters to further customize your QR Code Art.


QR Weight (–qrw):

This parameter determines to what degree the QR Code is prominent in your final image. The default value for this parameter is 0.8, but you can adjust it between 0 and 2 as per your satisfaction. Higher values for this parameter will make the QR code more prominent however it may compromise the art behind the code.


Balance Steps (–steps):

This parameter determines the number of times the image is sampled during the generation process. The higher the number of steps the higher the art is prominent in the final image. However, the higher values of this parameter will compromise the scannability of the QR code. The default value is 16, but you can set it between 10 and 20 based on your preference.


Is QR Code Art Scannable?

As mentioned earlier, increasing the balance steps can compromise the scanability of the QR code art. Similarly, other factors can also impact the scalability of the code. Overall the QR codes are scannable. You can scan them yourself to check if they work properly. Here are some results I obtained:

Quick QR Art without Stable Diffusion

It’s worth noting that in case you are trying to scan these QR code arts with iPhone’s Camera app, it may not work. You will need a dedicated QR Scanner for these to work. You can use Google Lens as well.


Conclusion

As AI continues to evolve, it’s no more limited to text-based prompts. AI is making its way into the world of visuals now. Following this, QR Code Arts have become quite trendy recently. You must have seen them on the Internet. If you want to generate one for yourself or your business but don’t have a powerful machine to run a stable diffusion control net, this blog should come in handy for you. In this blog, we have discussed how you can generate QR code art without stable diffusion. Hopefully, this comprehensive guide will be helpful for you.
If you want more tutorials on AI, you can explore the category here.

Here is How to Lock Your WhatsApp Chats for Added Privacy

Meta has just announced an exciting feature for their largest instant messaging platform Whatsapp. This feature is called “WhatsApp Chat Lock”. As the name suggests, this feature will help you add an additional layer of security to your intimate conversations.

In this comprehensive guide, we will explore how you can activate the WhatsApp Chat Lock feature. Additionally, we will see why this feature is an effective way to safeguard your privacy when someone else is using your phone.


What is WhatsApp Chat Lock?

WhatsApp has this feature of locking the entire app with your biometrics for a long time. However, if you want to lock specific chats individually, WhatsApp Chat Lock comes into play. This feature enables you to keep your most personal and sensitive chats away from prying eyes.

If you are confusing this feature with archiving chats, you are wrong. Archiving merely hides the chats, while the Chat Lock relocates the selected chats to a dedicated secure folder, which can only be unlocked with your biometrics. Consequently, even if someone gains access to your unlocked WhatsApp, they won’t be able to access those specific locked chats. Isn’t it exciting? Let’s explore more.


Additional Features of WhatsApp Chat Lock

This feature is not just about locking the chats. It offers more! When a chat is locked, any media content, such as photos and videos shared in that specific chat won’t be saved to your phone’s gallery. This acts as an additional layer of privacy which ensures that the sensitive media files remain hidden and protected.

Additionally, the message notifications for locked chats are hidden. It prevents any third party from reading the content of the message from hidden chat. So even if your device is unlocked, the content of locked chats will remain hidden and secure.


Limitations of WhatsApp Chat Lock

While WhatsApp Chat Lock acts as an outstanding additional privacy layer, the limitations of this feature must not be neglected. Currently, the feature is only functional for your primary WhatsApp device. This means that the same chat will not be locked on your linked devices.

Moreover, you can currently unlock the secured chats with your PIN, password, or biometric authentication. So it’s crucial that you keep these biometrics/codes secure so that no one can have unauthorized access to your WhatsApp chats.

It’s notable that Meta acknowledges these limitations and has plans to introduce future enhancements to the feature. In the future, we may be able to set a unique password or PIN for locked chats.


How to Activate WhatsApp Chat Lock

Follow this simple step-by-step guide to take your WhatsApp privacy to next level!

  • After opening WhatsApp, navigate to the specific chat you want to lock.
  • Tap the contact name to access the chat info screen.
  • Scroll down and select the “Chat lock” option under “Disappearing Messages”.

WhatsApp Chat Lock - Name Navigation

  • Enable the “Lock This Chat with Touch ID” toggle.
  • A message will pop up informing you that this chat will not be locked on your linked devices. Click OK.

WhatsApp Chat Lock - Toggle On

  • Confirm your identity by authenticating your biometrics or codes.
  • A message will appear saying “This Chat is Now Locked”.
  • Enjoy peace of mind when someone else is using your phone!


How to Deactivate WhatsApp Chat Lock

  • Go to the Locked Chats folder at the top of your WhatsApp Chats screen.

WhatsApp Chat Lock - Locked Chats Folder

  • Authenticate your identity with biometrics or passcodes.
  • Open the Chat you want to deactivate the WhatsApp chat lock for.
  • Click on the contact name.
  • Scroll down and find Chat Lock
  • Toggle off Lock this Chat with Touch ID
  • Confirm your identity by authenticating biometrics.
  • The chat is now unlocked.


Conclusion

Meta just announced the WhatsApp Chat Lock feature. This is a powerful tool that enables users to take full control of their privacy. Using this feature, you can protect sensitive chats by individually locking them. You can follow the step-by-step guide provided in this article and you will be able to activate and utilize the WhatsApp Chat Lock feature. This feature not only hides conversations but also makes sure that the media content from that specific chat is not saved to your phone’s gallery. Additionally, this feature hides the message notification content for a locked chat. You don’t need to compromise your peace of mind anymore.

Hope you enjoyed the article. If you are someone who is looking for extra WhatsApp privacy, here is another blog for you. Learn how you can blur sensitive content when using WhatsApp Web.

ChatGPT Image Generator

ChatGPT Image Generator Explained – Unlocking the Visual Magic

ChatGPT is a text-based language model that utilizes Artificial Intelligence (AI) to provide human-like responses. While it’s an amazing text-based response generator, some users are interested in utilizing it as ChatGPT image generator that can produce results as images. However, it’s important to note that ChatGPT cannot generate actual images as an output. But wait! We have some workarounds that will allow ChatGPT to generate images based on your commands. So let’s dive in and explore how you can make ChatGPT generate images.


Can ChatGPT Generate Images?

The simple answer to this question is “no.” However, the question is not as simple. Let’s dive into more details.

Firstly, you can use ChatGPT as an excellent prompt engineer for other image generator AI tools like Mid-Journey or Stable Diffusion. For instance, I asked ChatGPT to generate a prompt that I could use with other AI models to generate my desired image from them.

My Prompt: “You will now act as a prompt generator. I will describe an image to you, and you will create a prompt that could be used for image generation. I will issue this prompt to other AI models that can generate images. The image I want to generate is a village view in the golden hour.”

Here is how ChatGPT responded:

ChatGPT’s Response: “Generate an idyllic scene showcasing a picturesque village nestled amidst lush greenery, with quaint houses and a small temple immersed in the ethereal glow of the golden hour. The surrounding landscape is embraced by a gentle mist, adding an aura of mystery and tranquility to the enchanting setting.”

Now I can use this prompt with Mid-Journey or Stable Diffusion to generate a beautiful landscape of a village in the golden hour.

Secondly, you can use ChatGPT image generator to actually produce images in response to your commands.


ChatGPT Image Generator: Examples and Functionality

If you want to experience ChatGPT as an image generator that operates within the ChatGPT model itself, here is a hack for you. Before getting into the details, let’s first take a look at a few examples of the output.


ChatGPT Image Generator


ChatGPT Image Generator


Enabling ChatGPT Image Generator

If you’ve made it this far, you must be eager to experience ChatGPT as an image generator yourself. Well, here’s how you can do it. I’ll share a prompt in the next paragraph. Simply copy the entire prompt and paste it into ChatGPT. This will transform ChatGPT into a ChatGPT image generator. However, there are a few limitations that you may encounter, which we’ll discuss towards the end of the article.


ChatGPT Image Generator Prompt

“You will now act as a prompt generator. I will describe an image to you, and you will create a prompt that could be used for image-generation. Once i described the image, give a 5 word summary and then include the following (markdown) = ![Image (https://image.pollinations.ai/prompt/{description}), where {description} = {sceneDetailed},%20{adjective1},%20{charactersDetailed},%20{adjective2},%20{visualStyle1},%20{visualStyle2},%20{visualStyle3},%20{genre},%20{artistReference}”


How Does ChatGPT Image Generator Work?

Simply copy the entire prompt I shared above and paste it into ChatGPT. ChatGPT will respond to you, just like the example I shared below. The response you receive might be the same or similar.

“Sure, I’d be happy to help you generate a prompt for image generation. Please go ahead and describe the image to me, and I’ll create the prompt for you.

Note: Please provide a detailed description of the scene, including any specific characters, visual styles, genre, and artist references if applicable.”


Now it’s your turn to provide a detailed description for the image generator prompt. You can also experiment with ChatGPT itself to create prompts for your desired image outputs, as we discussed earlier. Here are a few examples of how I generated these wonderful images by issuing the prompts:

 ChatGPT Image Generator

 ChatGPT Image Generator

Limitations of ChatGPT-Generated Images

Although it serves as a useful productivity tool that allows you to explore and obtain your desired outputs, the ChatGPT image generator does have a few limitations. Let’s discuss them one by one:

1. Low-resolution images

Using this method, ChatGPT generates low-quality images. While they may appear fine when viewed on your PC or mobile device, they become distorted when zoomed in or used elsewhere.


2. Inconsistency

Since ChatGPT is primarily designed for text-based responses, it may struggle when forced to generate images. Sometimes, you may envision a specific landscape, but ChatGPT produces a completely different result. This inconsistency can be frustrating at times.


3. Watermark

The generated images will have a permanent watermark located in the lower right corner. Unfortunately, you cannot remove this watermark, which can detract from the overall experience.


Conclusion

ChatGPT is a text-based model created to produce human-like responses during interactions. While its primary function is generating text, some users desire the ability to generate images based on their given prompts. Currently, there is no simple or official method to achieve this. However, in the article above, I shared a hack that allows you to generate impressive images using ChatGPT.

Hope you enjoyed the article. Wanna read more amazing blogs like “How to Jailbreak ChatGPT“? Discover our Artificial Intelligence Category!


Scroll to Top